
Windows 10 and Windows Server 2016 contain a curious problem affecting interactive windows services. When you switch to Session 0, you cannot use the keyboard and mouse. This frustrating flaw makes it impossible to interact with any window displayed in Session 0. You can’t even click the “Return Now” button to go back to your regular desktop!
Hopefully Microsoft will fix this bug soon. But if you are using RDP to connect to the server running AlwaysUp, you can use the free and reliable VNC software instead, to resume normal operation in Session 0.
What is VNC?
VNC (which stands for Virtual Network Computing) is a cross-platform technology facilitating remote desktop sharing and control. It is very similar to Microsoft’s RDP. With VNC, you install a software component on the machine you wish to view/control (“the server”) and run another component installed on your local computer (“the client”) to access the server’s desktop.
Which version of VNC should I use?
Several implementations of VNC are available for Windows. We have used (and can recommend) RealVNC, UltraVNC and TightVNC, but this article will focus on TightVNC because it is:
- actively maintained
- free for both personal and commercial use
- fully supported on Server operating systems
- already installed and in daily use on our Windows Server 2016 QA/test server! 🙂
Note however that TightVNC does not currently encrypt desktop traffic. Look to UltraVNC or RealVNC Professional Edition if that is an important consideration.
How to Use TightVNC to Access Session 0 Remotely
Download TightVNC for Windows
Install TightVNC on the Remote Server
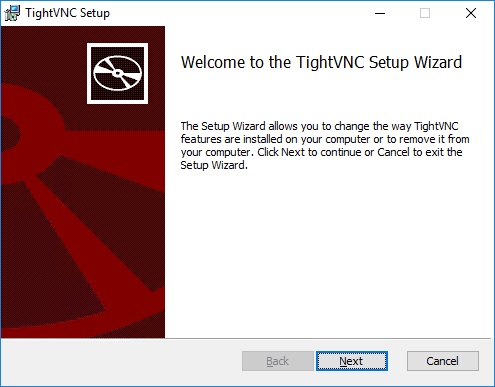
Run the installer on your server (the computer running AlwaysUp):
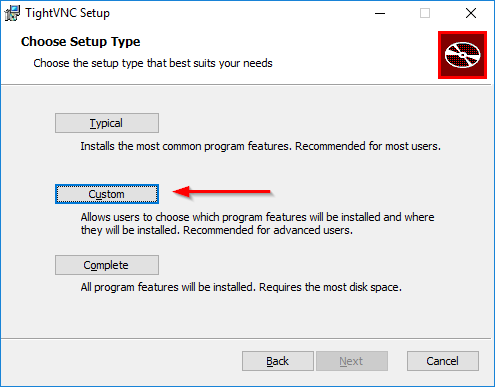
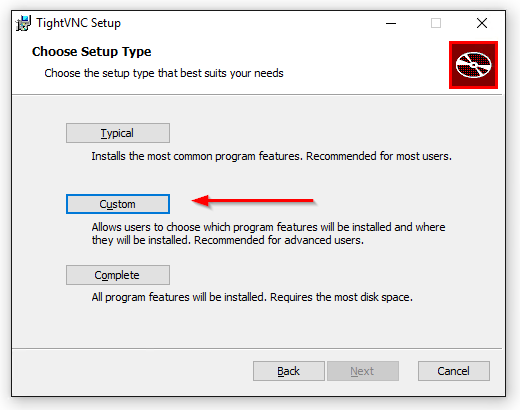
Accept the terms and click Next. When you get to the Choose Setup Type screen, click the Custom button:
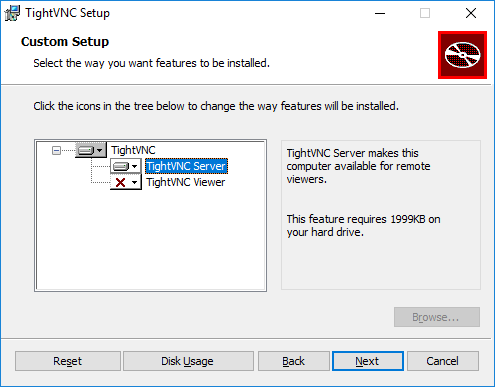
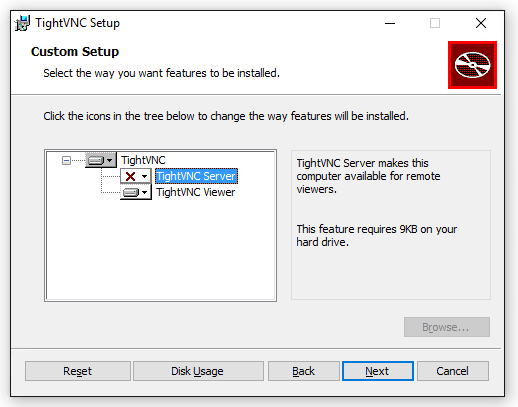
On the Custom Setup Type screen, configure the tree so that TightVNC Server will be installed. We decided to omit the TightVNC Viewer since we have no need for that component on the server:
Click Next to continue.
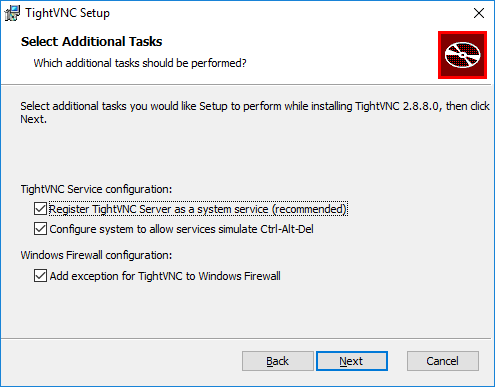
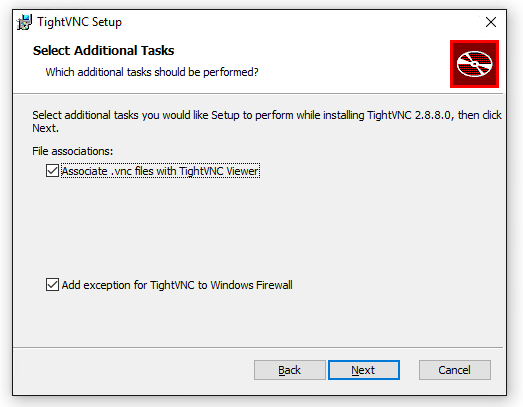
We recommend sticking with the defaults on the Select Additional Tasks screen. It is best to run VNC as a windows/system service so that it starts promptly after a reboot, without anyone having to log in first:
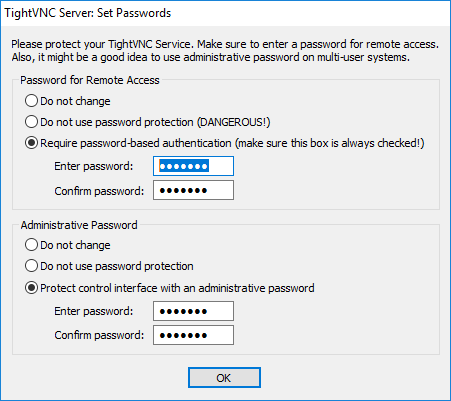
The rest of the installation process should be straightforward so please proceed with your good judgment. Be sure to set strong passwords when you get to the Set Passwords step!
Install TightVNC on the Client
Launch the installer to your client computer — most likely your PC with the physical keyboard and mouse attached.
When you get to the Choose Setup Type screen, once again click the Custom button:

On the Custom Setup Type screen, configure the tree so that only TightVNC Viewer will be installed:

Click Next to continue.Again, the defaults on the Select Additional Tasks screen are probably fine:

Follow the remaining prompts to complete the installation.
Run the Viewer to Connect to the Server & Switch to Session 0
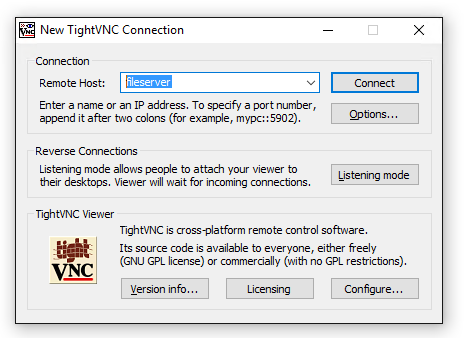
Start the Viewer application (C:\Program Files\TightVNC\tvnviewer.exe) on your client PC. Type in the host name (or IP address) of the server and click the Connect button:

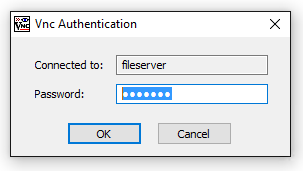
Next, enter the password you specified for the server (in step 2e) and click OK:

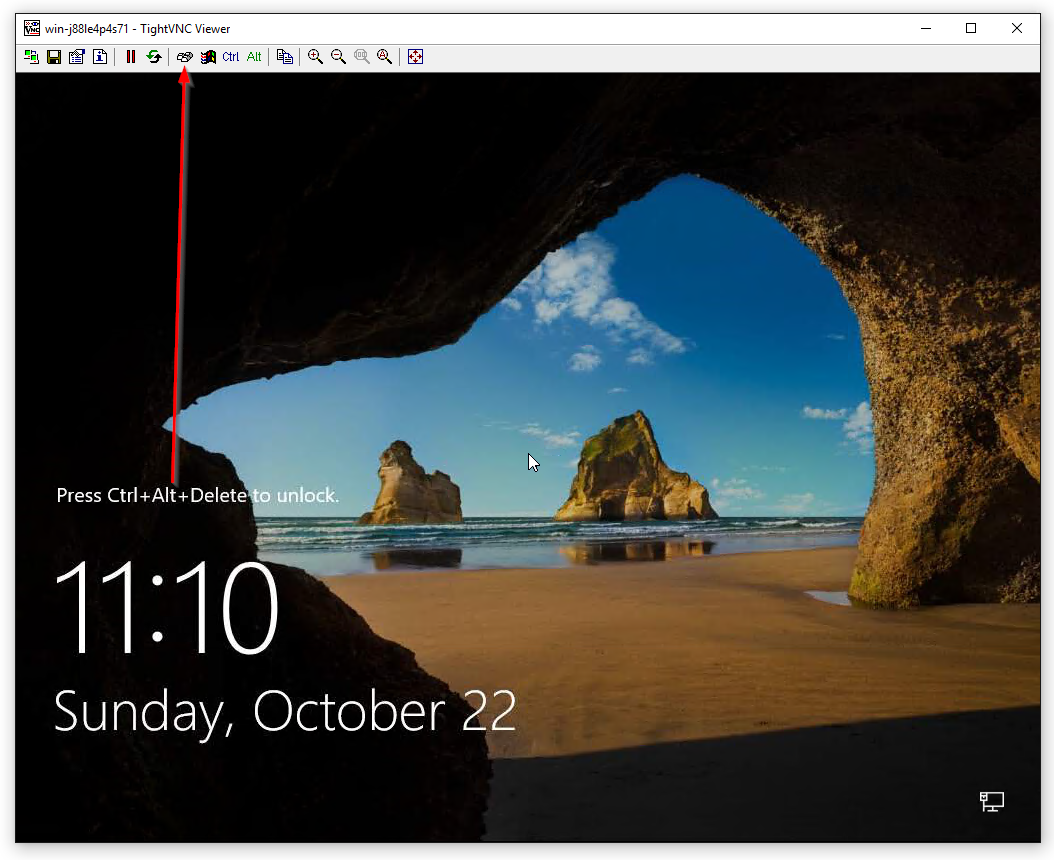
A window showing your server’s desktop will appear. Click the Ctrl+Alt+Del button on the toolbar to sign in to Windows:

Once you are in, switch to Session 0 — either from the Tools menu in AlwaysUp, or via our free Switch to Session 0 utility. You will be able to use your keyboard and mouse!
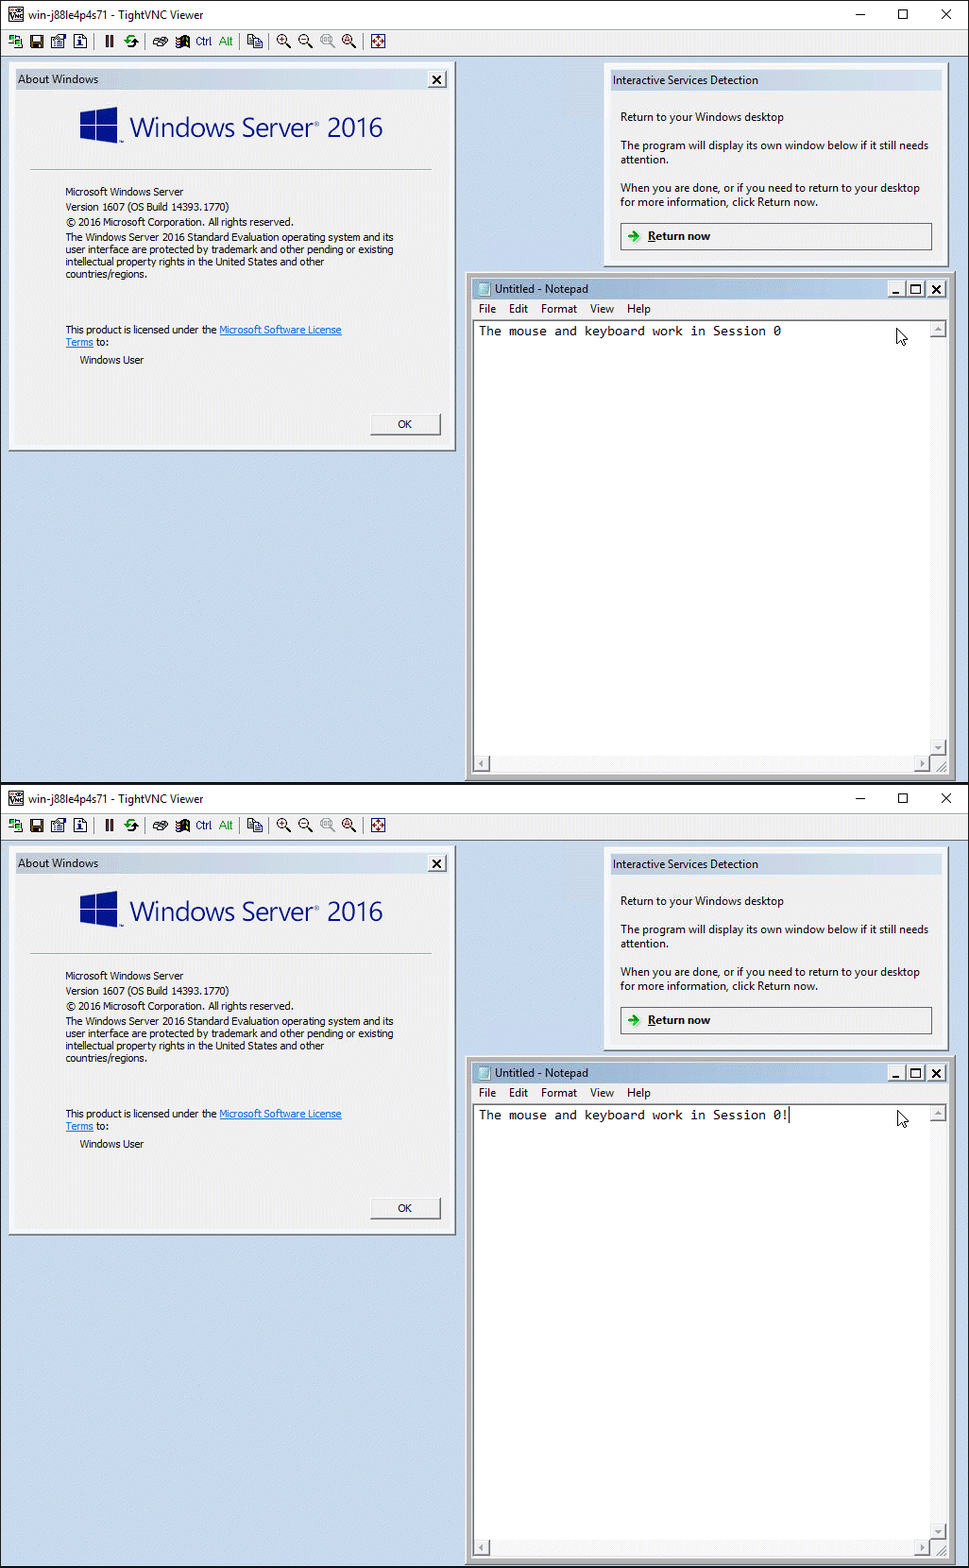
Here is our Windows Server 2016 machine with both winver.exe and Notepad running in Session 0:

Grab the latest 64-bit or 32-bit installer from the TightVNC download page. It will only be a couple of megabytes large.
We will run the installer on both the server and client machines.
After installing, TightVNC Server will be running in the background as a windows service (and will start automatically when your server boots). Check it out in Services.msc:
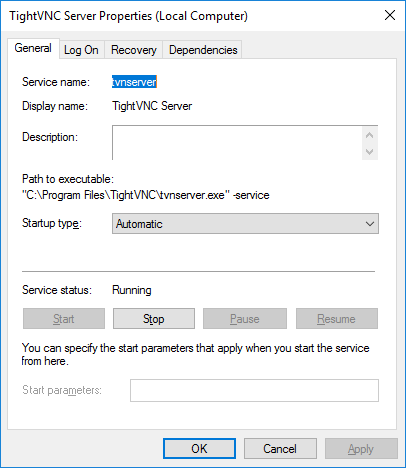
TightVNC Viewer will be available in the C:\Program Files\TightVNC folder. You may want to place a shortcut to the viewer application (tvnviewer.exe) on your desktop for convenience.
Caveat: Not a solution for one computer
Using the VNC remote access software won’t work if you only have a single computer setup. VNC cannot view itself — not without incurring the wrath of infinity. 🙂 For the single computer scenario, you have to wait for the folks in Redmond to wave their magic wand and fix the bug…



Thank you very much! Been looking all over the web for this!
Dear All,
I already installed Ultra VNC in sevre 2016, but i cant access from any utra vnc remote softwares,
please update me its possible to access sever 2016 stdn, via Ultra viewer
Thank you
deepak
Deepak: You should be able to access you Server 2016 computer via VNC. What error are you seeing? How are you trying to connect to the computer running VNC?