What is the “automatically reconnect network drives” feature? Why would I use it?
To answer those questions, let’s start with the basics. You can skip the next section if you already know what a network drive is and how it works.
Network drives, explained
A network drive is a drive letter that allows you to access data not stored on your computer’s hard disks.
To explain a bit more, a network drive consists of:
A drive letter, in the range of A-Z, where the remote data will be available;
The full UNC path of a folder on a remote computer.
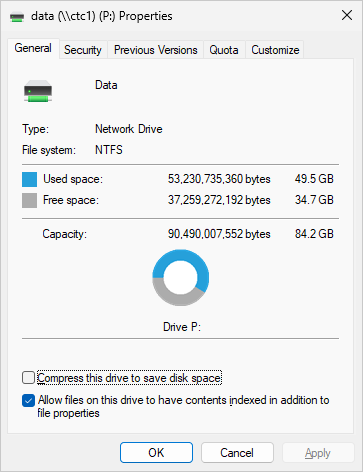
For example in our company, each workstation has “P” — a network drive mapped to a shared folder on our server’s hard drive. You can see our P drive’s properties here:
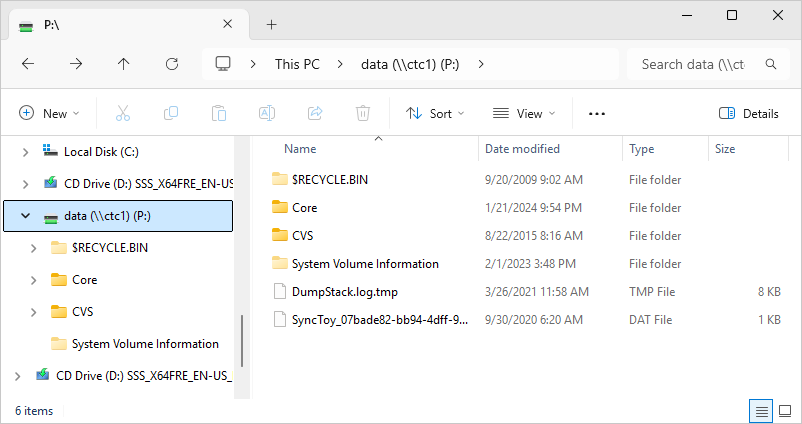
And with the P drive in place, Windows Explorer simply shows it alongside the other drives on the computer:
So instead of typing in “\\ctc1\\data\” when working with programs and scripts, we can simply use “P:\” in its place — like other, normal folders on our machine. That’s because P is a helpful alias for the “\\ctc1\\data\” folder.
Maybe you have a “G drive” or a “W drive” at work? Those are network drives too, that share documents across your team. Aren’t they convenient?
Windows Services and network drives
By default, network drives are mapped in the context of a specific user. To say it another way, the network drives that you create are only available in your Windows account. That makes sense; not everyone may have access to the network locations that you can visit.
However, that approach creates an obstacle when AlwaysUp runs your application as LocalSystem — the default account for Windows Services. In that scenario, the drive you mapped in your account may not be visible to your application because it’s running in the LocalSystem account.
But even if you instruct AlwaysUp to run your application in a normal user account, Windows will not automatically restore your network drive letters. In that case, your application will still have access to the network location (via the UNC path), but the convenient drive letter will not be available.
AlwaysUp will restore your drive letters for you
When you enable the “automatically reconnect network drives” feature, AlwaysUp will cycle through your drive letters and restore each one. That way, the application you’re running with AlwaysUp will have full access to the network drives that it needs to do its work.
You don’t need this feature if your application doesn’t use a network drive
Of course, restoring network drives won’t do you any good if your application doesn’t use them! In that case — or even if your application uses UNC paths instead of mapped drives — you can ignore the “automatically reconnect network drives” feature. You don’t need it.
How do I activate the feature in AlwaysUp?
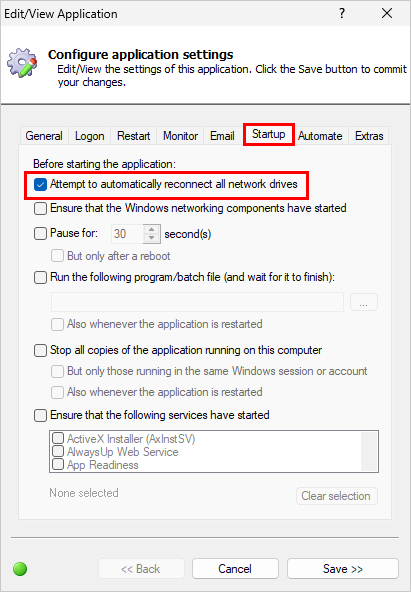
To tell AlwaysUp to automatically reconnect your network drives, edit your application’s entry in AlwaysUp and check this box on the Startup tab:
How do I know if AlwaysUp hasn’t mapped my drive?
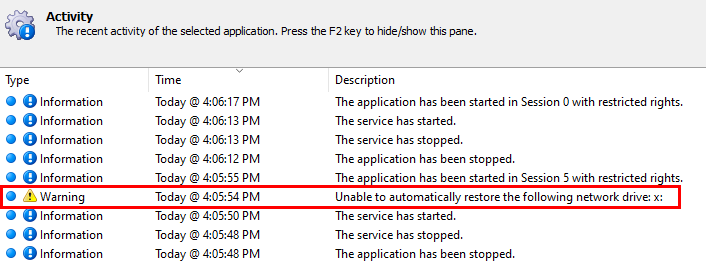
If AlwaysUp was unable to restore a network connection, you’ll see an error in the activity. It should show up in the activity panel (as shown in the screenshot below) or when you generate a report by selecting Application > Report Activity from the menu:
AlwaysUp isn’t reconnecting my drive. Help!
For unusual situations like this, we recommend troubleshooting from a command prompt launched from AlwaysUp. Follow the directions and once the command prompt comes up on your screen, change directory (CD) to the drive. Hopefully Windows will return a helpful message that sheds some light on the problem.
In some circumstances, Windows may require you to enter the password to restore the network drive. Naturally, those drives cannot be reconnected without some help. The next section presents an alternative way forward.
How do I map my drive when AlwaysUp cannot do it automatically?
If AlwaysUp fails to map your drive automatically, you should map the drive with a script and configure AlwaysUp to run that script before it launches your application. Here’s the step-by-step process:
Compose a version of the NET USE command that maps your network drive.
For example, your command may look like this if you need to provide a password to map the H drive:
net use H: \\fileserver1\shared-documents /user:mjones [mjonespassword] /persistent:yes
Test to ensure that your command does the trick when you run it from a prompt.
Save your command to a batch file (*.bat). Be sure to protect the file from non-authorized personnel if it contains a password!
Start AlwaysUp and edit your application.
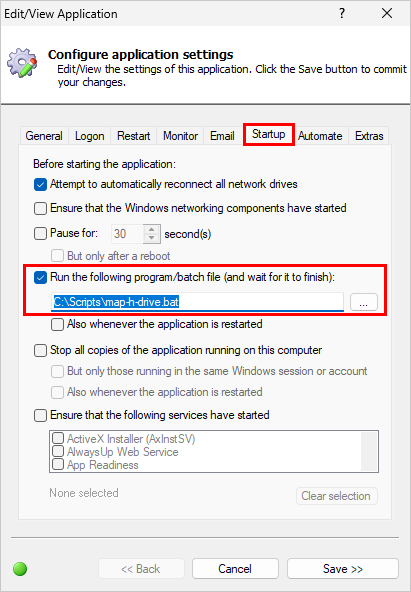
Switch to the Startup tab. From there, check the Run the following program/batch file option and provide the full path to the script you created in step 2:
Save your updates.
With that change in place, AlwaysUp will map your drive whenever it starts. And after doing that, AlwaysUp will launch your application — with your drive ready and available.

