My main goal is to run Google Drive for desktop as a service. But there is an existing Windows Service that I need to run after Google Drive has launched. Is it possible to use AlwaysUp to start it after Google Drive has started?
— Shaheed
Hi Shaheed, thanks for trying AlwaysUp.
The answer to your question is yes. Please follow these steps to setup Google Drive and your other service in AlwaysUp.
1. Install Google Drive as a service with AlwaysUp
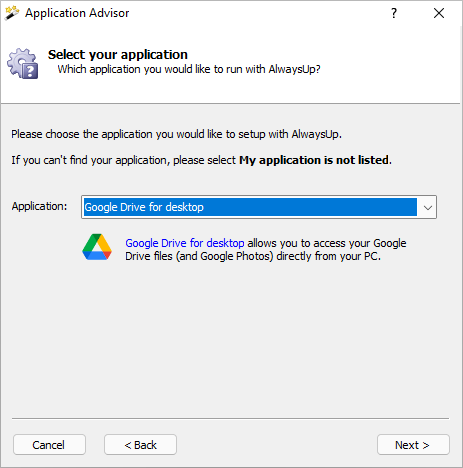
As described in our step-by-step tutorial, the new AlwaysUp Application Advisor supports Google Drive for desktop:
Instead of leaving you to figure out and apply the best settings to support background file synchronization, simply click through the Advisor’s straightforward prompts to create your Google Drive service — in less than 2 minutes.
At the end of the process, your Google Drive for desktop will be installed as a 24/7 Windows Service. Afterwards, test and make sure that the new service syncs your files as expected.
2. Have AlwaysUp start the other service after it runs Google Drive
Now that Google Drive is set up, let’s turn our attention to starting the other service at the right time.
Please:
Edit your Google Drive for desktop entry in AlwaysUp.
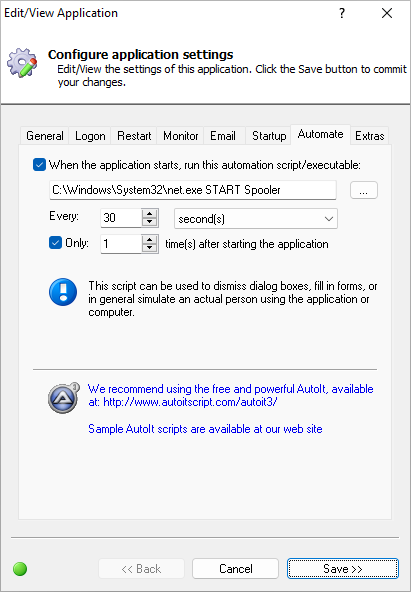
Move to the Automate tab.
Check the When the application starts… box at the top.
Enter the following command (which will start your service):
C:\Windows\System32\net.exe START "<Service-Name>"
where <Service-Name> is the name of your service. Note that the quotes around the name are required if it contains a space.
In the Every section, specify when the service should be started.
Check the Only option and set the value to 1 (because we only need to start the service once).
Finally, save your settings.
For example, if you want to start the Print Spooler service (named “Spooler”) 30 seconds after Google Drive starts, your Automate tab should look like this:
3. Change your service to start manually
Is Windows starting your service when the computer boots? If so, you may want to change that because with step 2 in place, AlwaysUp will start the service when it’s needed.
To prevent Windows from starting your service at boot:
Start the Services application (run “services.msc” to launch it)
Scroll the list to find your service.
Double-click the entry to bring up the service’s properties.
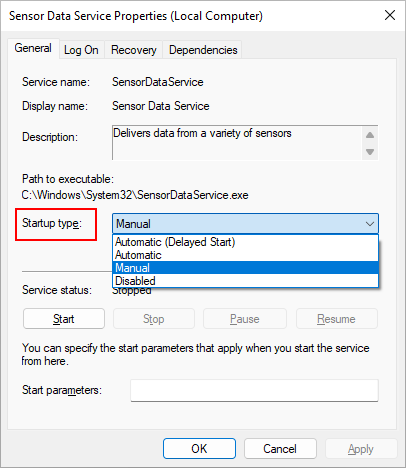
In the Startup type field, select Manual. It should look like this:
Save your changes.
And that’s it!
Next time your computer boots:
Windows will automatically start AlwaysUp
AlwaysUp will start Google Drive
And after a few seconds/minutes (whichever you specified), AlwaysUp will start your service.
All the best.


