The Core Technologies Blog

Professional Software for Windows Services / 24×7 Operation


Q&A: How do I Test the “Check Web Server” Sanity Check?

Q&A - Test Web Server
  I’ve already started the trial of the Service Protector and I’m comfortable with the way it is working. I manually stopped my web service and Service Protector started it up right away.

I’m specifically interested in detecting some nasty 502 errors and downloaded the check website BAT file.

Any suggestions on how to simulate or force a 502? My test environments rarely crash (of course) and I need to gain a little bit of confidence before applying to one of our big customers.

— Greg

Hi Greg, thanks for trying Service Protector.

After discussing with our team, here are three ways you can test:

1. Specify a non-working URL

To make the sanity check work, you had to specify your server’s URL in the batch file (in the SET url line).

For example:

      SET url=http://localhost:8080

To confirm that your service will be promptly restarted when the sanity check fails, simply specify a bogus URL in the batch file.

An invalid URL will cause the URL ping to fail and signal Service Protector to restart your Windows Service — every time the sanity check runs.

To perform this test:

  1. Open the batch file in your favorite text editor

  2. Update the SET url line with a URL that does not point to an actual site

  3. Save the batch file

  4. Launch Service Protector

  5. Highlight your web server service and select Application > Start Protector

  6. Wait for the sanity check to be run (as per the frequency you provided when you setup the sanity check)

  7. Validate that your service is stopped and restarted, as expected

2. Update your web application to return a 502

The previous test applies to all failures, not only 502 errors.

If you have control of your web site code — in Laravel, Django, ASP.NET or another dynamic framework — you can create a URL endpoint that simply returns 502.

Put that URL that into the check website batch file (in the SET url line) and your service should be restarted whenever Service Protector runs the sanity check.

3. Use the free webhook service

If you don’t want to mess with your web site, we recommend use the free webhook service to create a URL that always returns a 502. If you place that URL in your batch file, your service should be restarted every time the sanity check is run.

To create the endpoint:

  1. Open this page in your browser: https://webhook.site/

    A unique URL will be created automatically for you:

    Create a Webhook URL
  2. This URL is immediately usable, but it will return HTTP Status code 200 by default. Click the Edit button and change the Default status code to 502. You might as well put in some response text, to explicitly signal what the URL does too:

    Set the Webhook default status code to 502

Visit the URL to ensure that it is responding as expected:

Check that the Webhook URL returns 502

Note that the URL won’t be available forever. From the Webhook.site Terms of use:

  For non-Premium URLs, data may be automatically deleted after a maximum of 7 days.

So you’ll have to purchase a premium offering if you want the URL to persist.

Happy testing!

Posted in Service Protector | Tagged , , , , | Leave a comment

Why are there 3 copies of Dropbox Running on my PC?

Why are there 3 copies of Dropbox Running?

Whenever you fire up Dropbox (or it starts automatically at login), you will soon notice three Dropbox.exe processes running on your PC. Though unusual, that is completely normal behavior. It’s just how Dropbox works.

You can see the three processes running in the Windows Task Manager:

Dropbox processes in Task Manager

Or better yet, if you really want to understand what is going on, turn to Microsoft’s excellent Process Explorer. Its helpful tree panel will reveal the hierarchical relationship between the Dropbox processes — one parent and two children:

Dropbox Processes in Process Explorer

But why are 3 copies of Dropbox started? Isn’t one enough to synchronize all the files and folders that the software is managing?

And why is one using significant CPU and memory while the other two remain small and idle?

Fortunately the command line parameters for each instance of Dropbox reveal what is going on…

#1 is the “Main” Dropbox process

With the help of Process Explorer, we can see that the main/parent executable runs with a single parameter: /home:

Main Dropbox Exectuable Properties

That is consistent with the desktop shortcut to start Dropbox, which specifies the same parameter:

Dropbox Desktop Shortcut Properties

So that’s the one we started.

Digging in a little deeper, we saw this process consistently using a small bit of CPU (1-10%) and a fair chunk of memory (200+ MB).

Furthermore, we noticed that the CPU and memory would jump whenever we placed a new file in the Dropbox folder.

Our conclusion? This parent process is responsible for Dropbox’s primary activity: copying your files to and from the cloud.

#2 is the “Crashpad Handler”

The second process has a massive command line — over 3600 characters!

Most of the command line is meaningless without a technical understanding of the arguments, but the first parameter stands out: -type:crashpad-handler:

Dropbox Crashpad Handler Properties

This “crashpad handler” consumes a mere 2 MB of RAM — infinitesimal, by today’s standards. What is its purpose?

Our research suggests that the process implements Crashpad — a crash reporting system developed by Google.

From the software’s stated objective:

  Crashpad is a library for capturing, storing and transmitting postmortem crash reports from a client to an upstream collection server. Crashpad aims to make it possible for clients to capture process state at the time of crash with the best possible fidelity and coverage, with the minimum of fuss.

So it is very likely that when the main Dropbox process crashes or runs into trouble, the “crashpad handler” will jump in to collect information and beam it back to Dropbox headquarters for subsequent analysis.

#3 is the “Exit Monitor”

The third process has a command line just shy of 400 characters in length. Its “type” is exit-monitor:

Dropbox Exit Monitor Properties

As the type suggests, exit monitor’s job is to watch the main Dropbox process and restart it if it fails. Its purpose is to make sure that Dropbox is always running on your machine — even in the face of crashes and other failures.

To sum up

Having three Dropbox.exe processes is completely normal. Dropbox performs your file synchronization in one executable but the other two are there to support the robust operation of the software. It’s all good!

Posted in Dropbox | Tagged , , | 12 Comments

Q&A: What’s the Difference between AlwaysUp and Service Protector?

AlwaysUp vs Service Protector
  We own a license of both AlwaysUp and Service Protector. It seems like AlwaysUp is able to do more (larger feature set) however the pricing is less then Service Protector. We are setting up new servers and need to transfer one of these programs over and I’m having a hard time deciding which to install on our new servers.

— Stephen

Hi Stephen. Thanks for being a customer, and for getting in touch!

You are right — AlwaysUp and Service Protector have quite a lot in common.

Both are focused on 24x7x365 operation, to ensure that your mission-critical software is always available. And both employ advanced features like CPU & memory monitoring, email alerts, and customized failure detection to strive for 100% uptime.

However AlwaysUp and Service Protector are different in one fundamental way:

Service Protector works with existing Windows Services

AlwaysUp enhances regular, desktop applications

So the choice of which one to use comes down to the software you want to run 24/7.

For example, let’s say that you want to ensure that your Apache web server is always serving customers. Since Apache is packaged and delivered as a Windows Service, you would use Service Protector.

On the other hand, if you want to make sure that the Dropbox file synchronization software is always backing up your files, you would need AlwaysUp because Dropbox is not already a Windows Service.

How do I know if my application is a Windows Service or a regular application?

You have a couple of options.

First, you can check the application’s documentation. The publisher will probably mention if the application is designed to run “headless” as a Windows Service.

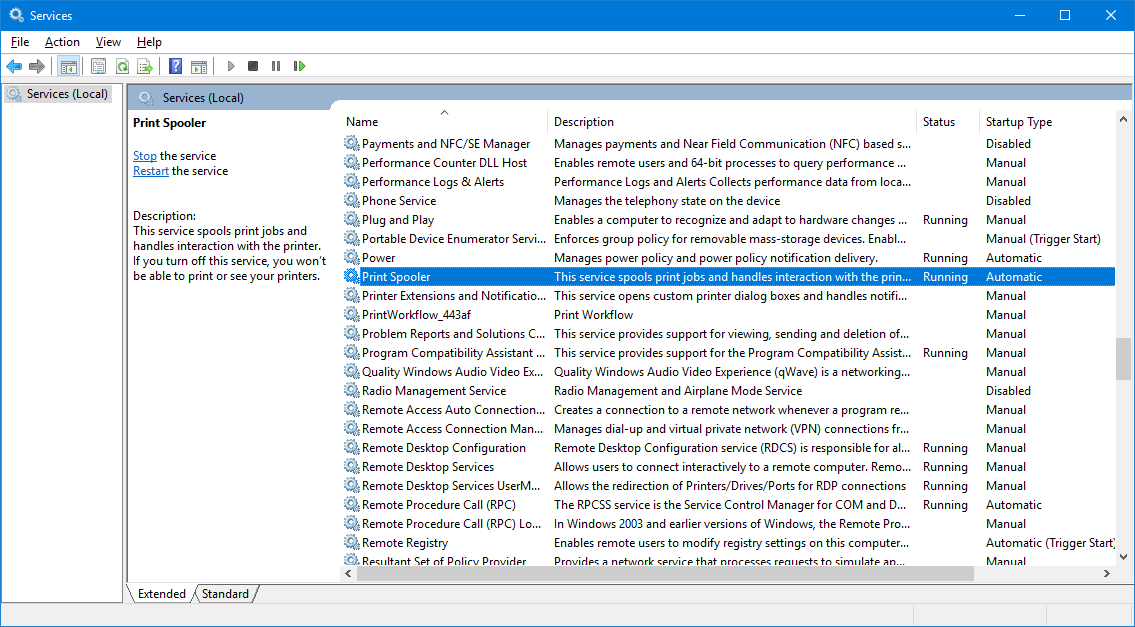
Second, if the documentation is unavailable, you can install the application and see where it lands. A Windows Service will be listed in the Services Control Panel application.

Start the Services app by typing services.msc from the Start button. You can also find it by searching for “services” in Control Panel:

Launch Services from Control Panel

Look for your application in the list. Be sure to scroll through and read the descriptions — sometimes the short names lack detail:

Services Application

If your application is listed in Services, go with Service Protector.

Otherwise, you have a regular desktop application and you should choose AlwaysUp.

In either case, please take advantage of the free 30-day trial to make sure that our software will solve your problem and work exactly as you expect!

Posted in AlwaysUp | Tagged , , , | Leave a comment

Q&A: How do I Connect to AlwaysUp Web Service to see my Windows Services?

Q&A - Connecting to Services
  I’ve installed AlwaysUp Web Service on a VPS running Windows Server 2012 R2. Is there any way to check the status of my services? I tried but was unable to connect. Please advise.

— Sebastian

Hi Sebastian. Thank you for trying our software!

Yes, AlwaysUp Web Service is designed specifically to check on your AlwaysUp Windows Services. You can see the status of each service visually in your browser or probe programmatically with the HTTP/HTTPS API.

But it seems that you are having trouble connecting to the service. Let’s walk through a few things to try:

Can you connect locally?

Please try connecting from a browser on the machine where you installed AlwaysUp Web Service.

From there, these URLs should take you to the login page:

Connect locally to AlwaysUp Web Service

If neither of those URLs load, perhaps the port number has been changed from the default (8585) or you are using HTTPS instead of HTTP.

Launch the AlwaysUp Web Service Control Panel application (available from an icon on your desktop, or at C:\Program Files (x86)\AlwaysUpWebService\ControlPanel.exe) and verify your settings:

Verify port and protocol settings

If applicable, update the URLs above and try again.

Please get in touch if you are not able to connect using a local URL. Something very strange is going on and our support team should probably take a deeper look.

Can you connect from another computer?

Next, please try to access the web service from a different computer. Browse to this URL:

http://[IP-Address]:8585

where [IP-Address] is the IP address of the computer where you installed AlwaysUp Web Service.

If you fail to connect with the IP address, please replace the IP address with the machine’s host name and trying again.

Do you see a timeout error?

It looks like this on Firefox:

Firefox timed out

And like this on Chrome:

Chrome timed out

If you’re experiencing a timeout, the Windows Firewall is the likely culprit.

Ensure that Windows Firewall isn’t blocking AlwaysUp Web Service

The Windows Firewall (also known as Windows Defender Firewall on the newest releases of Windows) blocks access into your computer, to prevent malicious activity. By default, all applications (and ports) are blocked. An application must be “allowed through the firewall” to accept connections from the outside world.

To enable AlwaysUp Web Service to accept and respond to remote browsers:

  1. Open Windows Control Panel and search for firewall. Click the Allow an app through Windows Firewall link:

    Search Control Panel for Windows Firewall

  2. Below the list of allowed applications and features, click the Allow another app button:

    Allow another app through the firewall

  3. In the Add an app window, click the Browse button and select the AlwaysUp Web Service executable. You will likely find it here:

    C:\Program Files (x86)\AlwaysUpWebService\AlwaysUpWebService.exe

    Add AlwaysUpWebService.exe
  4. Next, click the Network types button and configure the proper network access. We recommend checking both the Private and Public boxes:

    Choose Network Types

  5. Click the OK and Add buttons to return to the list of allowed applications. A new entry for AlwaysUp Web Service will be present:

    AlwaysUp Web Service in the list of allowed apps

  6. And finally, click the OK button to record all your changes.

With the new firewall rule in place, you should be able to open AlwaysUp Web Service from your favorite browser:

AlwaysUp Web Service: Working

Try it and see!

Posted in AlwaysUp Web Service | Tagged , , | Leave a comment

Backup and Sync getting in the way? Run it off-hours, when you’re not around

Backup and Sync File Synchronization

We’re huge fans of Backup and Sync — Google’s free Windows utility that continuously synchronizes our PC’s files with drive.google.com.

But lately, the software has been getting in the way on our development machines.

Specifically:

  • Backup and Sync can consume significant resources

    For example, we’ve noticed CPU spikes when several documents are changed simultaneously and uploaded to the cloud.

  • Backup and Sync causes desktop programs (like Microsoft Word and Excel) to occasionally fail to save their files

    In its zeal to immediately process any changes, Backup and Sync can lock files and interfere with the normal saving to disk. Warnings like this (from ToDoList) are all too common:

    Tasklist Save Error

    Updating large files seems to be particularly problematic.

  • Backup and Sync will show excessive “remove item” confirmations when a file is deleted

    Fortunately these notifications are easily disabled via Preferences but the setting is all or nothing. Ideally, we would like to omit confirmations on active development folders but that is not possible.

    Backup and Sync Remove File Warning

None of these is a major headache, but little day-to-day annoyances add up. What to do?

Eventually a key realization dawned on us…

We don’t need real-time file synchronization

Backup and Sync’s mission is to keep your files synchronized. As soon as a document is changed, it is copied up to the cloud.

Though a live copy is ideal, it is not essential for our situation. We will be satisfied with a periodic backup — a recent copy of key files in case of a catastrophe. Heck, a single snapshot every 24 hours would meet our modest needs.

With that understanding, our first adjustment was manual. We would simply exit Backup and Sync at the start of the work day and restart it when we were done for the evening. Doing so eliminated the daily annoyances, and gave Backup and Sync the whole night to catch up.

But some evenings we would forget to restart Backup and Sync, leaving our files unprotected. It was time for a robust, automated solution…

How to run Backup and Sync off-hours as a Windows Service

Step 1: Install Backup and Sync as a Windows Service with AlwaysUp

This first step will enable backups to run in the background — even when you’re not logged in to your computer.

Follow our step-by-step guide and you should be up and running in 10 minutes or less:

Backup and Sync Windows Service: Started

Step 2: Create a Scheduled Task to stop Backup and Sync every morning at 9 AM

  1. Start Task Scheduler. This is best done by running taskschd.msc from a command prompt, or by opening the Control Panel, searching for “schedule” and clicking the Schedule tasks link:

    Start Task Scheduler
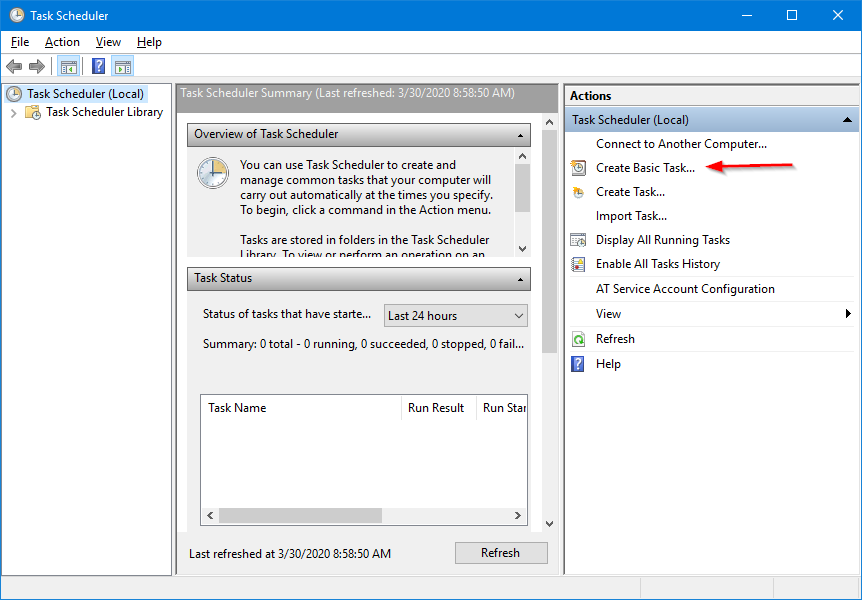
  2. Once the Task Scheduler window comes up, click Create Basic Task on the right:

    Create Basic Task
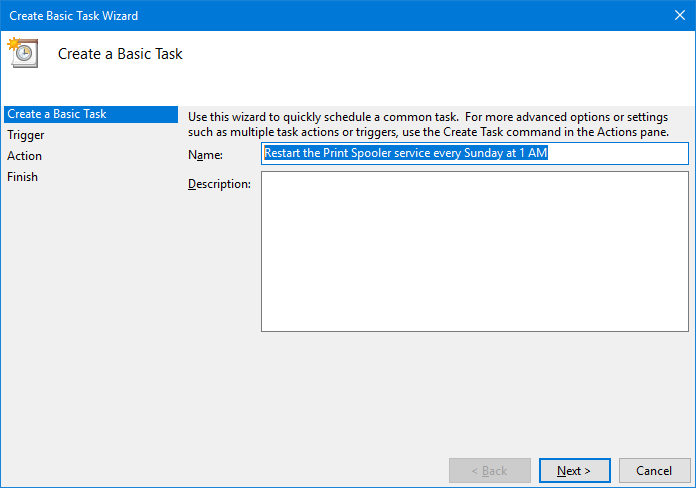
  3. In the Create Basic Task Wizard window, enter a suitable name for the task. We suggest “Stop Google Backup Service at 9 AM Daily”. Click Next when you are done.

    Stop Backup and Sync Service Task: Set Task Name
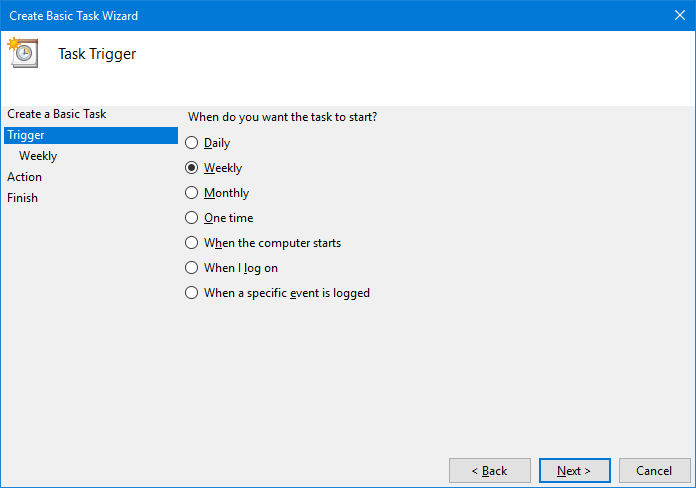
  4. We want to run daily, so make sure that option is selected and move on:

    Stop Backup and Sync Service Task: Daily
  5. Next, enter 9 AM in the Start controls:

    Stop Backup and Sync Service Task: Set Time
  6. Running this command will stop the Backup and Sync Windows Service created by AlwaysUp:

    NET.EXE STOP "Googledrivesync (managed by AlwaysUpService)"

    Enter that command on this screen, placing NET.EXE in the Program/script field and the rest in the Add arguments section:

    Stop Backup and Sync Service Task: Run NET Command

    Don’t forget the quotes!

  7. The next screen summarizes the task we’ve created. There is still a bit of work to do so check the Open the properties dialog box before clicking the Finish button:

    Stop Backup and Sync Service Task: Summary
  8. And finally, in the Properties window, ensure that the task will (1) run even if no one is logged on and (2) will run with highest privileges:

    Stop Backup and Sync Service Task: Properties

    Click OK to finalize your new scheduled task.

Step 3: Create a Scheduled Task to start Backup and Sync every evening at 7 PM

To create the second task that restarts Backup and Sync in the evening, simply repeat the process you followed in Step 2 with the following adjustments:

  1. Enter 7 PM instead of 9 AM

  2. Replace STOP with START when entering the program to run:

    NET.EXE START "Googledrivesync (managed by AlwaysUpService)"

Less timely backups, but less interruptions too

With these changes in place, our Backup and Sync only runs “off hours”. While our files aren’t synchronized with the cloud during the work day, the annoying interruptions have been eliminated. It has been a reasonable trade-off for our team.

Posted in Software | Tagged , , | Leave a comment