|
How to Keep RabbitMQ Server Running 24/7 with Service Protector |
Automatically restart the RabbitMQ Windows Service if it crashes or stops listening for messages. Guard against interruptions, memory leaks, CPU hogging and much more
Last Updated on October 5, 2026
RabbitMQ provides robust asynchronous messaging for complex applications.
It runs as a Windows Service with the
Erlang service wrapper,
as shown here in
Services.msc:
To monitor and protect RabbitMQ with Service Protector:
-
Download and install Service Protector, if necessary.
-
Start Service Protector.
-
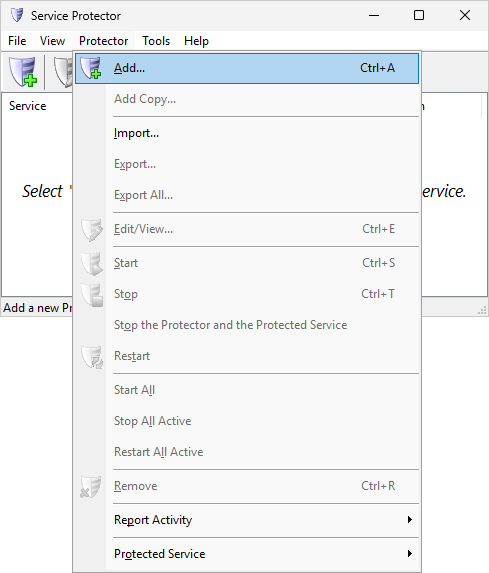
Select Protector > Add to open the Add Protector window:
-
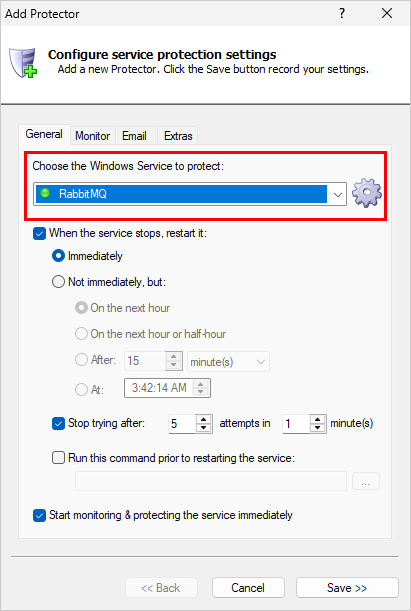
On the General tab, in the Service to protect dropdown, choose the RabbitMQ service, named RabbitMQ.
You'll notice a green circle on the left if the service is already running:
-
If you're interested in monitoring RabbitMQ and restarting it when it stops listening on its network port,
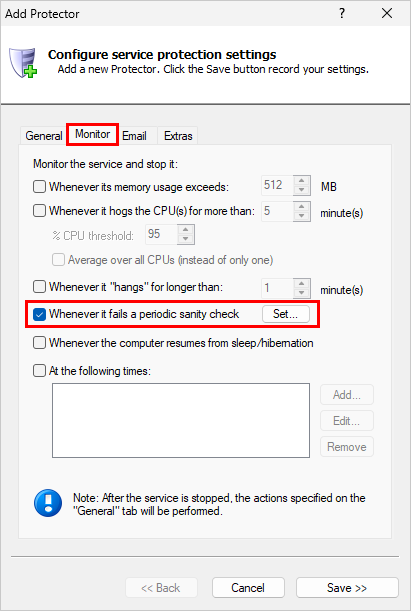
move to the Monitor tab. We'll set up a health check to tell Service Protector when RabbitMQ has failed.
-
Switch to the Monitor tab. Check the Whenever it fails a periodic sanity check box and click the Set button:
-
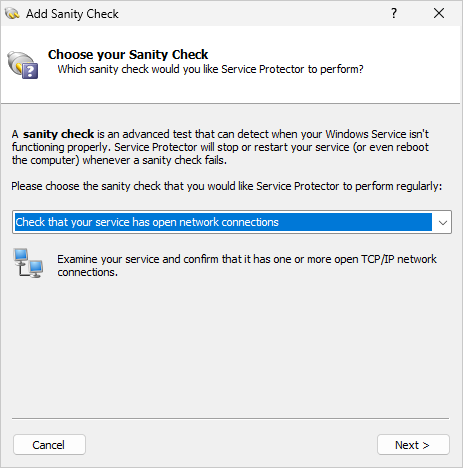
In the Add Sanity Check window, select the Check that your service has open network connections
option and click Next to proceed:
-
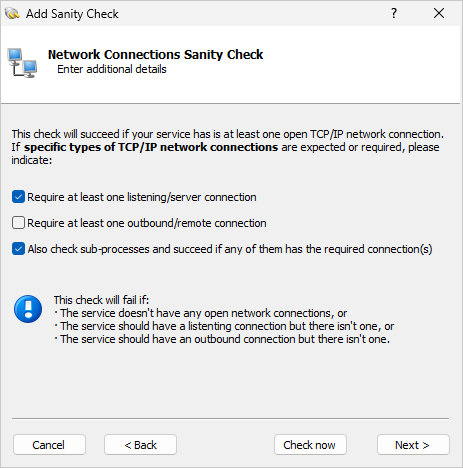
Since RabbitMQ should always be listening for requests, check the Require at least one listening/server connection box.
And because the TCP/IP connections will be held by a sub-process of the Erlang service wrapper,
activate the Also check sub-processes option:
Click Next to continue.
-
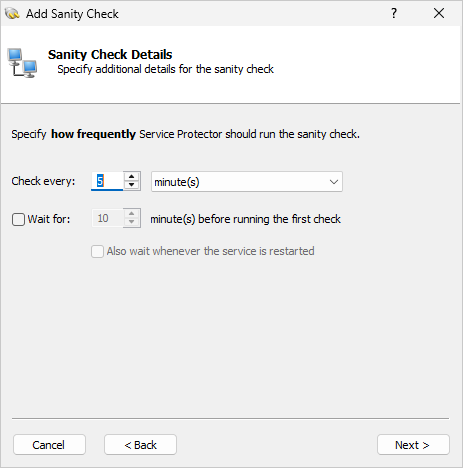
On this page, tell Service Protector how often to check RabbitMQ for the listening connection.
The default of every 5 minutes should be fine but you can check more often if you prefer.
After you're done, click Next to move on:
-
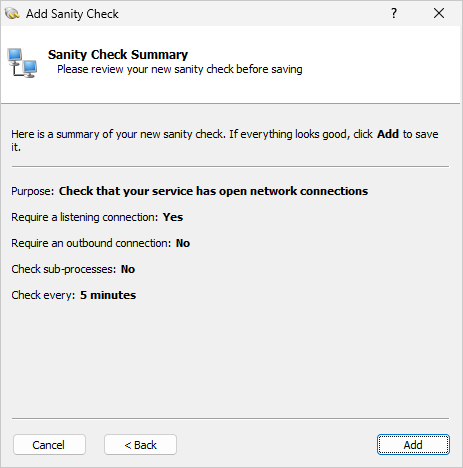
And finally, confirm your settings:
If everything looks good, click Add
to record your new sanity check and return to the Monitor tab.
-
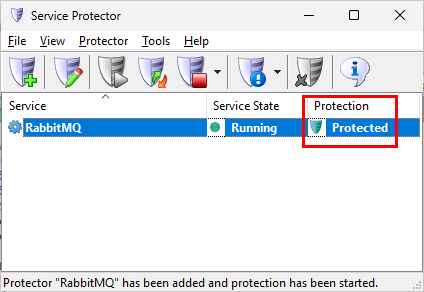
Click the Save button. In a couple of seconds, an entry for RabbitMQ will show up in the Service Protector window.
The green shield icon indicates that RabbitMQ is already protected by Service Protector:
-
That's it! Next time your computer boots, RabbitMQ will start as normal and Service Protector will begin monitoring RabbitMQ to promptly restart it if it fails.
We encourage you to edit RabbitMQ in Service Protector and check out the many other settings that may be appropriate for your environment.
For example, send an email when the service fails, restart the server weekly to defang memory leaks, and much more.
Trouble protecting the RabbitMQ Windows Service?
From Service Protector, select Protector > Report Activity > Today to bring up an HTML report detailing the interaction between Service Protector and RabbitMQ.
Browse the Service Protector FAQ for answers to commonly asked questions and troubleshooting tips. Contact us and we will be happy to help!
|
Peace of mind for your important Windows Services!
|
 |

|
Step-by-step guides for 70+ Services
|