-
Download and install Service Protector, if necessary.
-
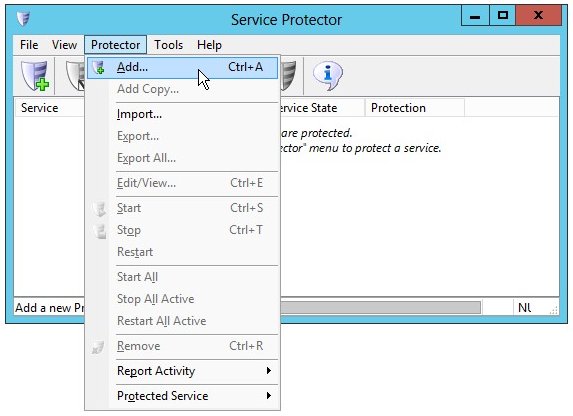
Start Service Protector.
-
Select Protector > Add to open the Add Protector window:
-
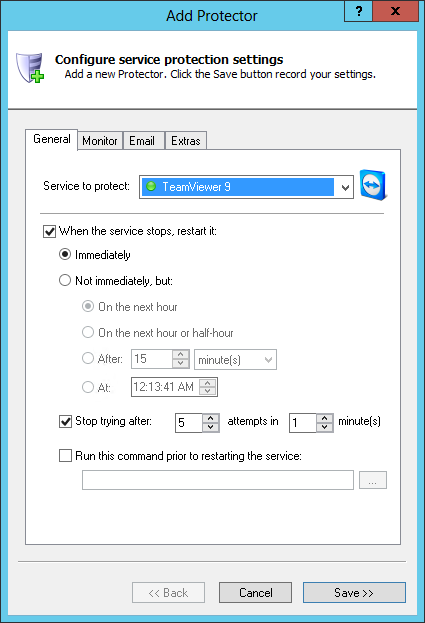
On the General tab, select the TeamViewer service from the Service to protect pull-down list.
Since we have installed TeamViewer 9.0 on our machine, this is called TeamViewer 9.
Your service should be named similarly, and
you will notice a green circle on the left if the service is already running.
-
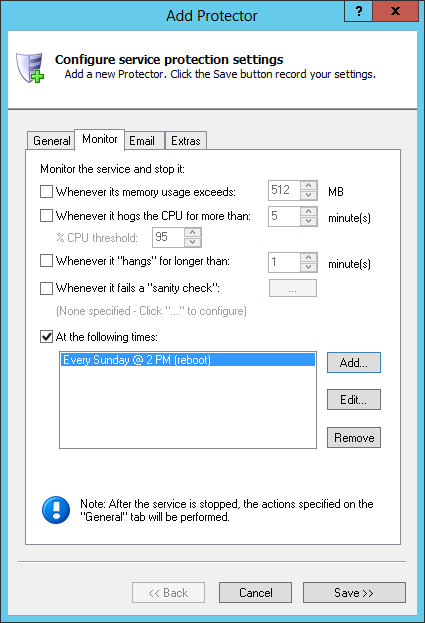
If you wish to be defensive and restart the TeamViewer service at a scheduled time - to keep it "fresh"
and reduce the toll of memory leaks and other ill effects - click over to the Monitor tab where we will
schedule a regular stop.
Check the At the following times box.
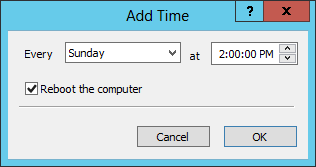
Click the Add button to summon the Add Time window.
Specify the day and time you wish to restart the service.
We have chosen every Sunday at 2 AM, a time when no one is likely to
need access to the remote machine.
Check the Reboot option if you would like to reboot the entire PC instead of just restarting the service
(as we have done).
Click OK to record your settings.
-
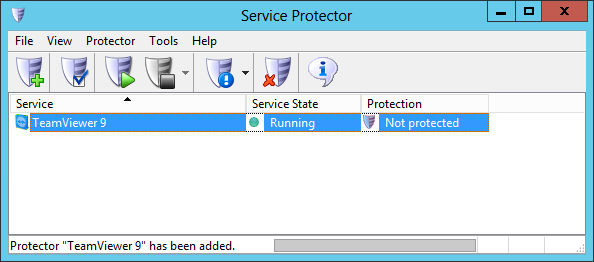
We are now done configuring TeamViewer so click the Save button. In a couple of seconds, an entry for TeamViewer will show up in the Service Protector window.
TeamViewer is probably already running but it is not yet being protected by Service Protector (as shown below).
-
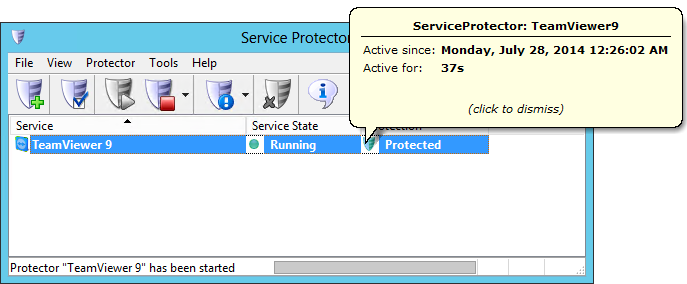
To start protection, choose Protector > Start "TeamViewer 9".
The shield icon will go to green to indicate that TeamViewer is being
monitored and protected by Service Protector.
Click on the green shield to bring up a popup indicating when protection
started. (You can also click on the green circle to see information on the service itself.)
- And now that you have a truly 24/7 TeamViewer setup, we recommend disabling automatic updates
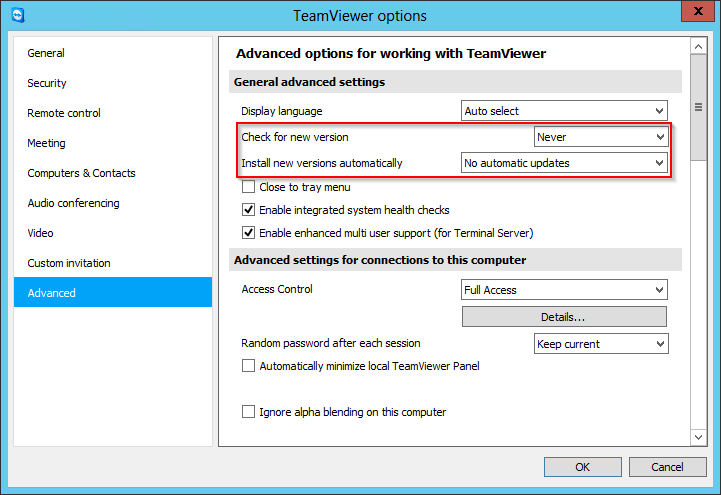
to keep your environment as consistent and stable as possible. To do so:
Start TeamViewer.
Select Extras > Options.
Select the Advanced item on the left.
Click the Show advanced options button on the right.
Set Check for new version to Never and
Install new versions automatically to No automatic updates
.
- Click OK to save your changes.
-
That's it! Next time your computer boots, TeamViewer will start and Service Protector will
begin monitoring the service to promptly restart it if it fails, crashes or stops for any reason.
We encourage you to edit your TeamViewer entry in Service Protector and review the many other
settings that could help in your environment.
For example, send an email when the service fails, check for TeamViewer getting stuck
starting or stopping, and much more.


