-
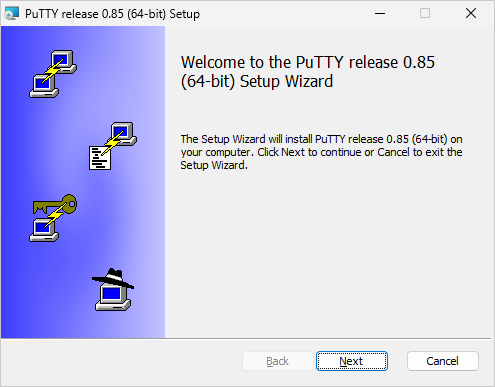
If necessary, download
and install PuTTY:
-
Construct the command that establishes your SSH tunnel using PuTTY's command line utility,
Plink.
For example, after consulting the
Plink command line documentation,
we decided to use this command to open up a tunnel from port 8022 on the local machine to port 80 on our web server at www.coretechnologies.com:
plink.exe -ssh -2 -N -L localhost:8022:www.coretechnologies.com:80 -l <login> -pw <password> www.coretechnologies.com
Note: Passing the password on the command line as above is insecure. For real-world environments,
set up a PuTTY saved session or store your private key in Pageant as described in the
PuTTY documentation.
Before continuing, open up a command prompt and make sure that your command works as expected. Be sure to
accept the server's host key
if you're prompted to do so.
-
Download and install AlwaysUp, if necessary.
-
Start AlwaysUp.
-
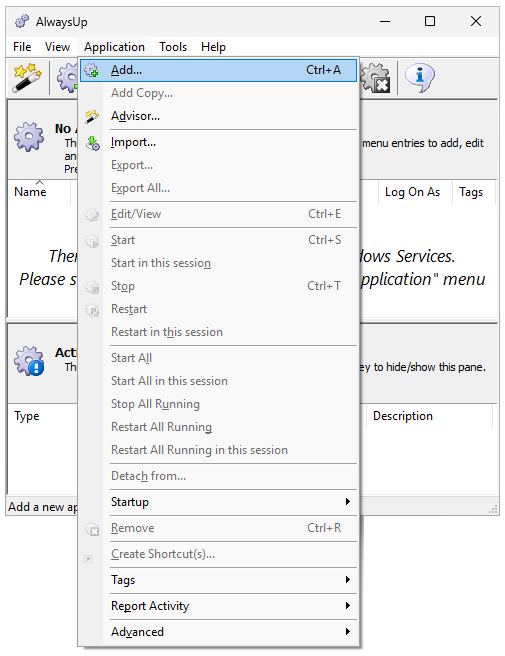
Select Application > Add to open the Add Application window:
-
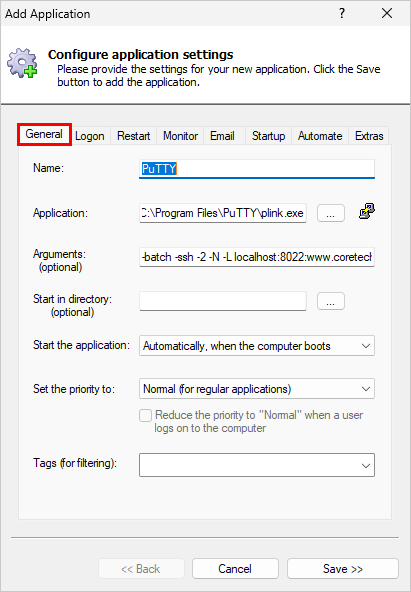
On the General tab:
-
In the Application field, enter the full path to PuTTY's command line executable, plink.exe.
If you installed PuTTY in the default location, this will be:
C:\Program Files\PuTTY\plink.exe
-
In the Arguments field, enter the parameters to Plink you identified in step 2.
We recommend adding the -batch" parameter here as well.
It disables interactive prompts, which you won't be able to answer when Plink is running unattended in the background.
-
In the Name field, enter the name that you will call the application in AlwaysUp.
We went with PuTTY but you can specify another name if you like.
-
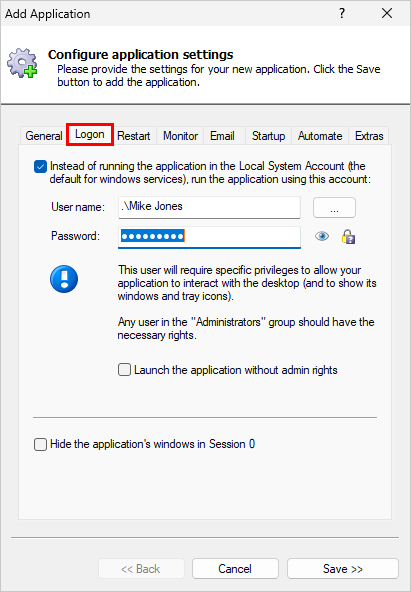
Move to the Logon tab and enter the user name and password of the Windows account where you have run your Plink command successfully —
probably the one you're logged in to right now.
AlwaysUp will run Plink in this account so that it can find its settings, saved host keys, etc.
-
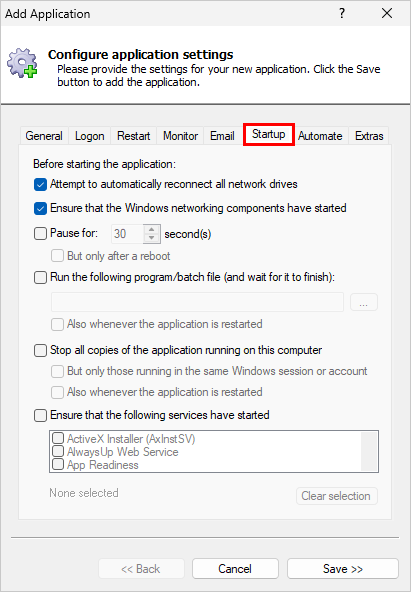
Go to the Startup tab and check the Ensure that the Windows Networking components have started box.
This informs AlwaysUp that Plink needs the network to be fully available to do its work.
-
We're done configuring PuTTY as a service so click the Save button to record your settings.
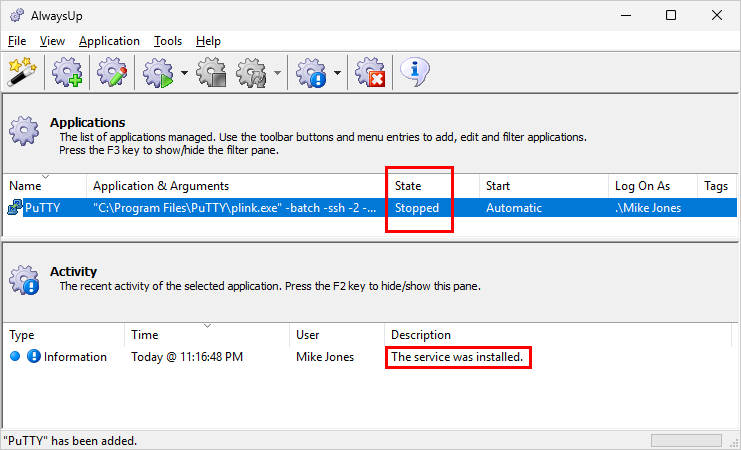
In a couple of seconds, an application called PuTTY (or whatever you called it)
will show up in the AlwaysUp window. It's not yet running though so the state will be "Stopped":
-
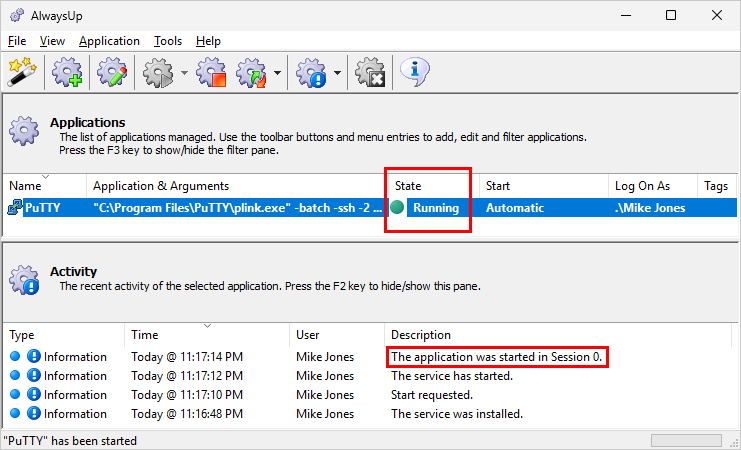
To start PuTTY from AlwaysUp, choose Application > Start "PuTTY".
The state will transition to "Running"
after a few seconds and the tunnel will be established as expected:
-
That's it! Next time your computer boots, your SSH tunnel will fire up immediately, without anyone needing to log on.
Please restart your PC now and test that everything works as expected after Windows reboots.
And please feel free to edit PuTTY in AlwaysUp to check out the many other settings that may be appropriate for your environment.
For example, send email alerts if the SSH tunnel breaks, boost the priority of plink.exe, and more.