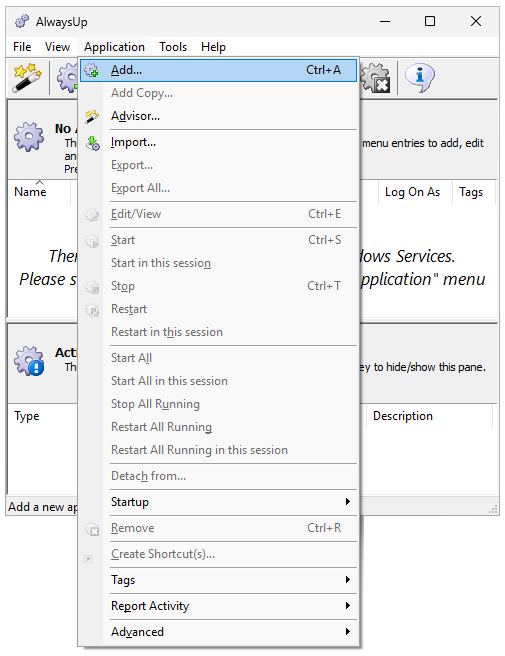
Select Application > Add to open the Add Application window:
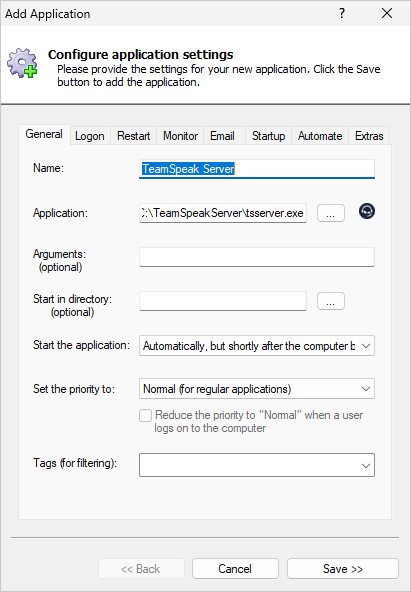
On the General tab:
In the Application field, enter the full path to the TeamSpeak Server executable, tsserver.exe.
That's "C:\TeamSpeakServer\tsserver.exe" on our computer.
In the Start the application field, choose Automatically, but shortly after the computer boots.
This setting introduces a short delay before AlwaysUp starts TeamSpeak Server whenever the machine boots.
That should be enough time for critical supporting services to initialize themselves. We don't want TeamSpeak starting too soon.
And in the Name field, enter the name that you will call the application in AlwaysUp.
We put in TeamSpeak Server but you can specify virtually anything you like:
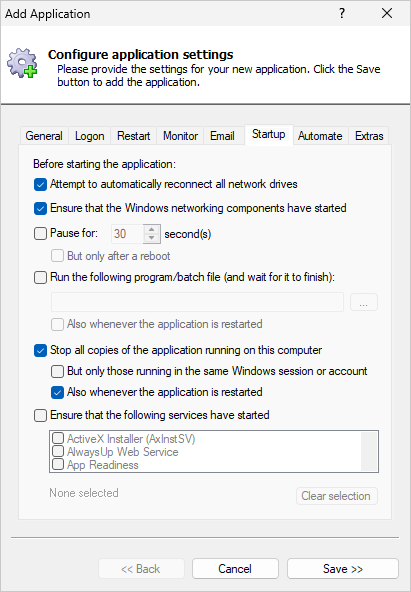
Move to the Startup tab and check the Ensure that the Windows Networking components have started box.
This informs AlwaysUp that TeamSpeak needs the TCP/IP networking stack to operate.
We also recommend checking both the Stop all copies of the application running on this computer and Also whenever the application is restarted boxes.
Those options will ensure that another copy of tsserver.exe doesn't prevent the instance launched by AlwaysUp from starting properly:
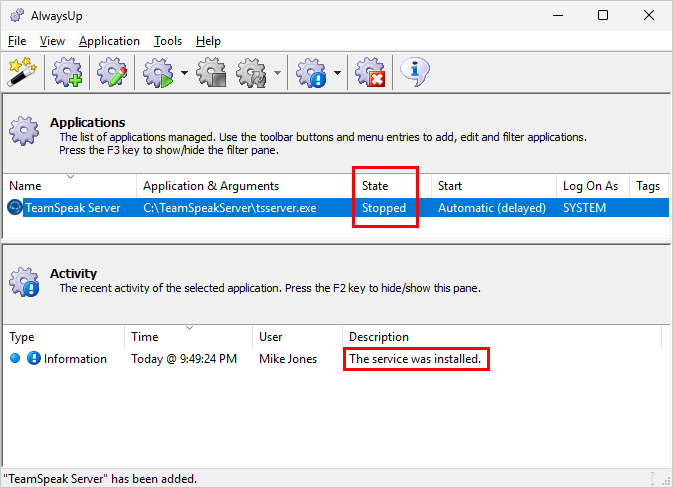
Click the Save button. In a couple of seconds, an application called TeamSpeak Server will show up in the AlwaysUp window.
At this point, TeamSpeak is installed as a service. But it's not yet running and the state will be "Stopped":
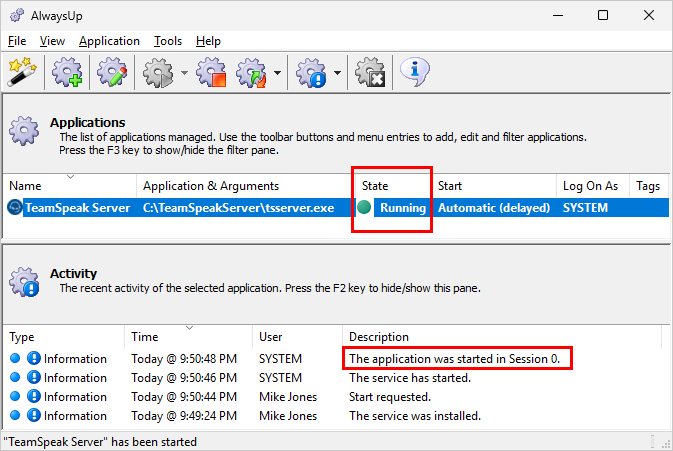
To start TeamSpeak, choose Application > Start "TeamSpeak Server".
The state will change to "Running" and the VOIP server will be working in the background:
That's it! Next time your computer boots, TeamSpeak Server will start up immediately, before anyone signs on.
TeamSpeak Server not working properly as a Windows Service?
Check the TeamSpeak log file for errors and warnings. The file will be in the logs sub-folder (in the directory where you placed TeamViewer Server).
Consult the AlwaysUp Troubleshooter — our online tool that can help you resolve the most common problems encountered when running an application as a Windows Service.
From AlwaysUp, select Application > Report Activity > Today to bring up an HTML report detailing the interaction between AlwaysUp and TeamSpeak. The AlwaysUp Event Log Messages page explains what each message means.
Browse the AlwaysUp FAQ for answers to commonly asked questions and troubleshooting tips.