|
How to Start hubiC 24/7 as a Windows Service with AlwaysUp |
Automatically launch hubiC as soon as your server boots, without having to log in. Keep it running 24x7 to ensure that your files are always synchronized!
hubiC is an online file storage service. The windows desktop client actively synchronizes files between the PC and the cloud.
To install the hubiC desktop client as a windows service with AlwaysUp:
-
Download and install the hubiC windows client, if necessary.
Configure the software (with your synchronization folder, etc) and ensure that it works properly.
-
Download and install AlwaysUp, if necessary.
-
Start AlwaysUp.
-
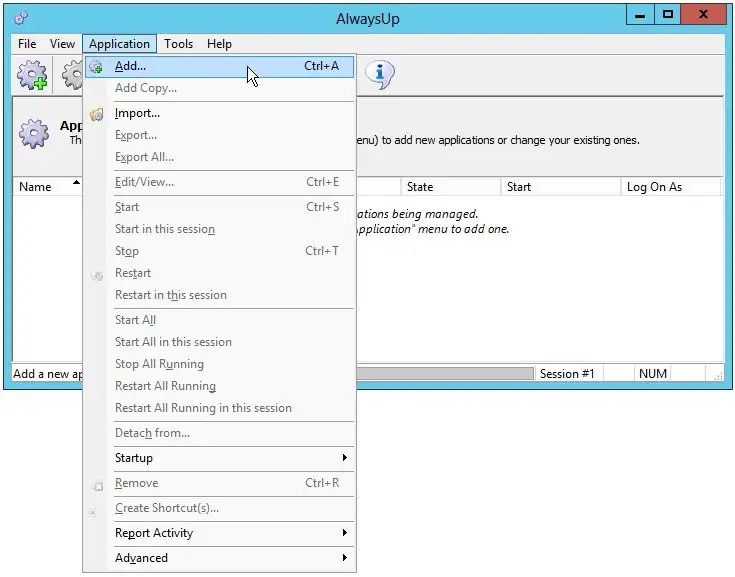
Select Application > Add to open the Add Application window:
-
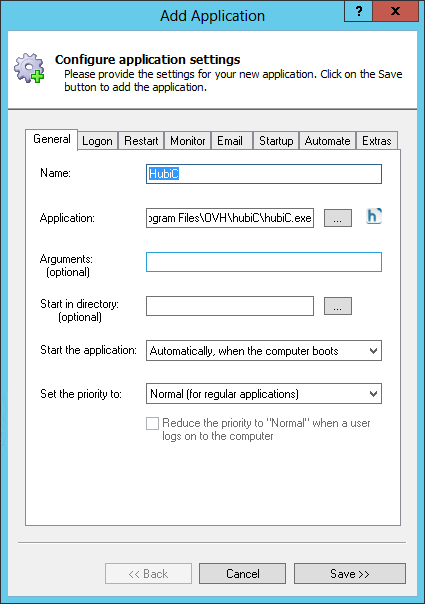
On the General tab:
-
In the Application field, enter the full path to the hubiC executable, hubiC.exe. If you installed hubiC in the default location, this will be:
C:\Program Files\OVH\hubiC\hubiC.exe
-
In the Name field, enter a name for this application in AlwaysUp.
We have gone with the default of HubiC but you can specify something else if you like.
-
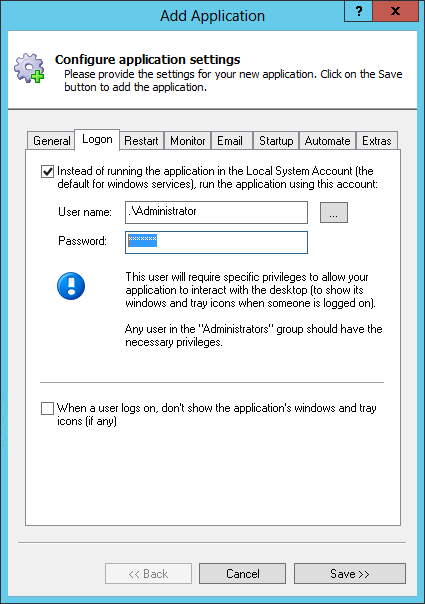
Click over to the Logon tab and enter the user name and password of the windows account where you installed hubiC.
hubiC must be configured to run in this account or else it will not work.
-
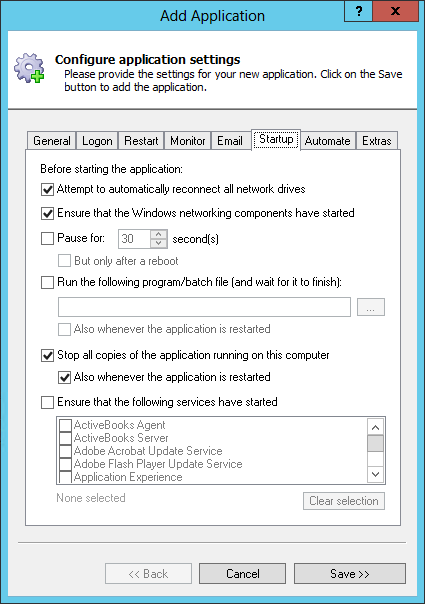
Next, switch to the Startup tab.
Check the Ensure that the Windows Networking components have started box.
This informs AlwaysUp that hubiC needs the TCP/IP networking stack to start and operate properly.
And to ensure that hubiC remains under the management of AlwaysUp, check the both the Stop all copies of the application running on this computer
and Also whenever the application is restarted boxes.
-
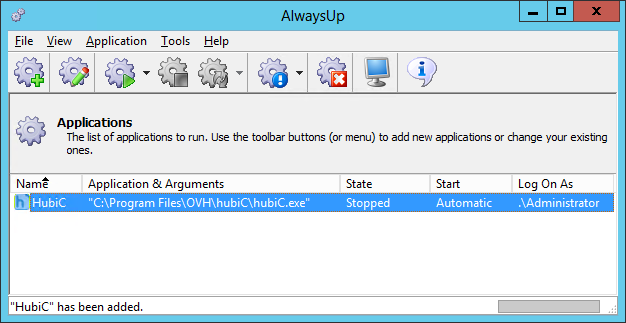
We're now done configuring hubiC to run as a windows service, so click the Save button. In a couple of seconds, an application called hubiC will show up in the AlwaysUp window.
It is not yet running though (as evidenced by the Stopped state):
-
Now that we are ready to start hubiC in the background with AlwaysUp, let's ensure that it doesn't try to start again when you logon. Please:
-
Start hubiC from its desktop icon.
-
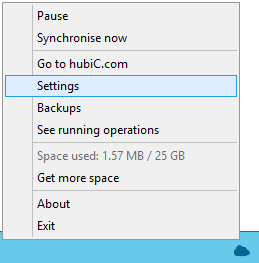
Once it is done authenticating, right click on the hubiC task bar icon (the blue cloud) and select Settings from the menu:
-
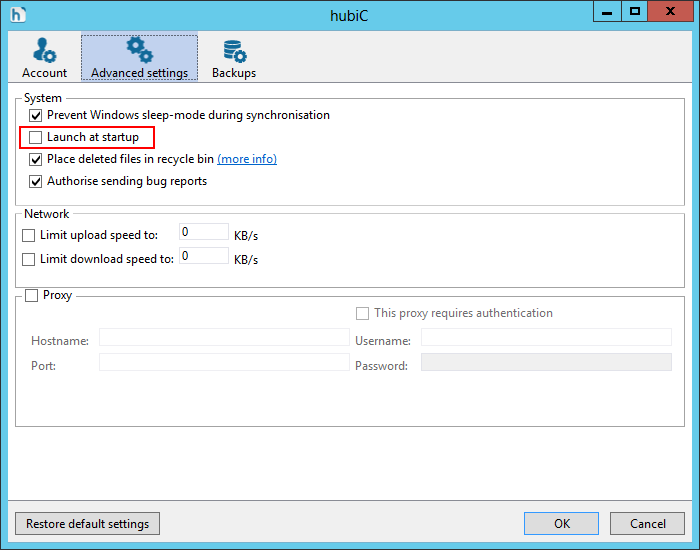
Activate the Advanced Settings tab at the top.
-
Un-check the Launch at startup checkbox.
-
Click the OK button to record your change.
-
Finally, right-click on the hubiC tray icon again and select Exit to close out the instance running on your desktop.
-
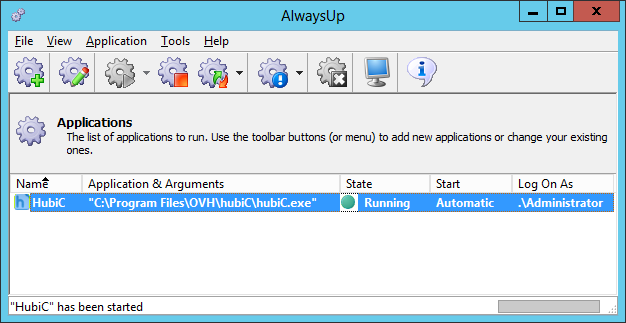
To start hubiC as a Windows Service, switch back to AlwaysUp and choose Application > Start "hubiC" from the menu.
After a few seconds, the starte should transition to Running.
-
That's it! Next time your computer boots, hubiC will start up immediately, before anyone logs on.
We encourage you to edit hubiC in AlwaysUp and check out the many other settings that may be appropriate for your environment.
For example, boost the priority of the hubiC process (to give it more CPU), send email if hubiC fails, and much more.
hubiC not working properly as a Windows Service?
- Stop hubiC in AlwaysUp and start it normally on your desktop. Check if hubiC is showing any error alerts or is misconfigured in some way.
-
Consult the AlwaysUp Troubleshooter - our online tool that can help you resolve the most common problems encountered when
running an application as a windows service.
-
From AlwaysUp, select Application > Report Activity > Today... to bring up a HTML report detailing the interaction between AlwaysUp and hubiC.
The AlwaysUp Event Log Messages page explains all the messages.
- Browse the AlwaysUp FAQ for answers to commonly asked questions and troubleshooting tips.
- Contact us and we will be happy to help!
|
Over 97,000 installations, and counting!
|
 |

|
Rock-solid for the past 20+ years!
|
Fully Compatible with 160+ Applications...
|

