|
How to Run Apache Derby Network Server as a Windows Service with AlwaysUp |
Start your Java Database Server when your PC boots and keep it running 24x7. Survive crashes, hangs, accidental shutdowns and more
Last Updated on May 25, 2026
Note: Apache Derby was retired in October 2025.
The software is still available for download and continues to work with the latest vesrions of Windows but
all development (including security updates) has ceased.
This guide remains here for reference only.
Apache Derby is a small-footprint, open source relational database implemented entirely in Java.
To configure the Derby Network Server as a Windows Service with AlwaysUp:
-
Download, install and configure Derby, if necessary.
Please make a note of where you installed it as this will be used in later steps. We put Derby in C:\Derby for this tutorial.
-
Download and install AlwaysUp.
-
Start AlwaysUp.
-
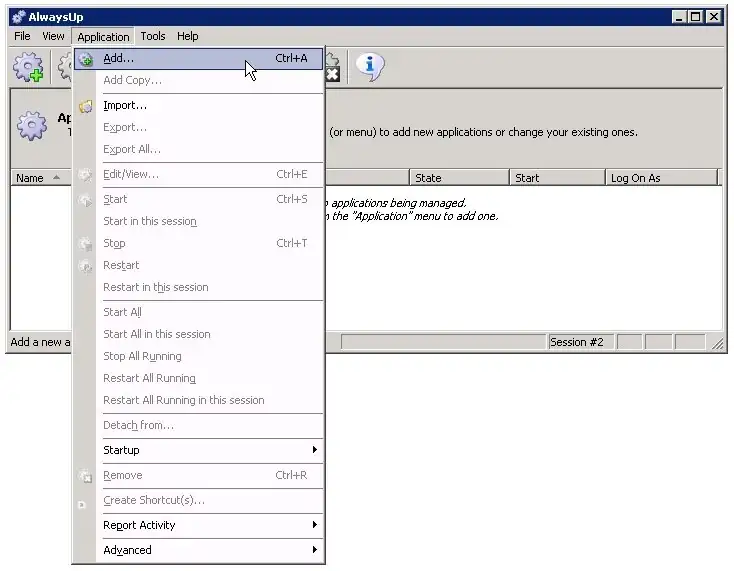
Select Application > Add to open the Add Application window:
-
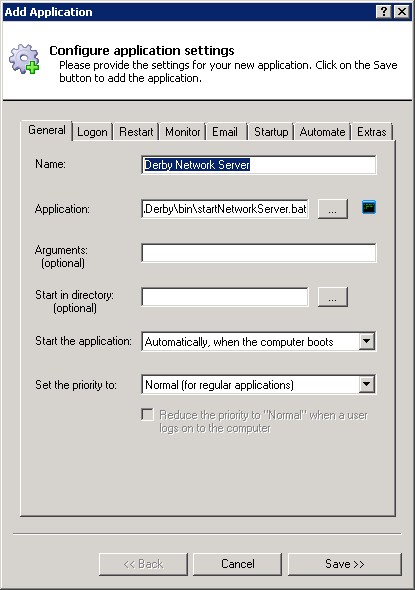
On the General tab:
-
In the Application field, enter the full path to the
batch file that starts Derby Network Server, startNetworkServer.bat.
Since we have placed Derby in C:\Derby, this is:
C:\Derby\bin\startNetworkServer.bat
-
In the Name field, enter the name that you will call the application in AlwaysUp.
We have specified Derby Network Server but you can specify another name if you like.
-
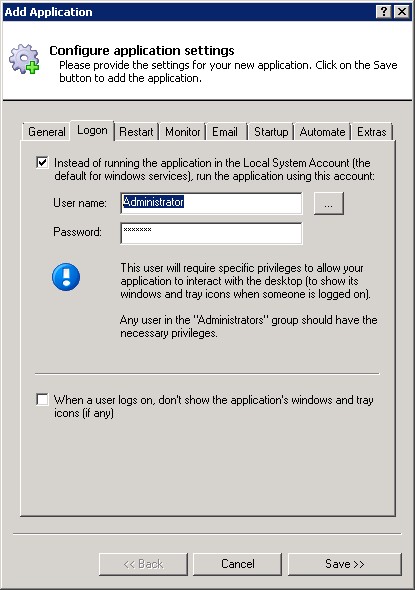
Click over to the Logon tab and enter the user name and password of the account in which you installed Derby.
Derby should run in this account so that it can find its settings, java, etc.
-
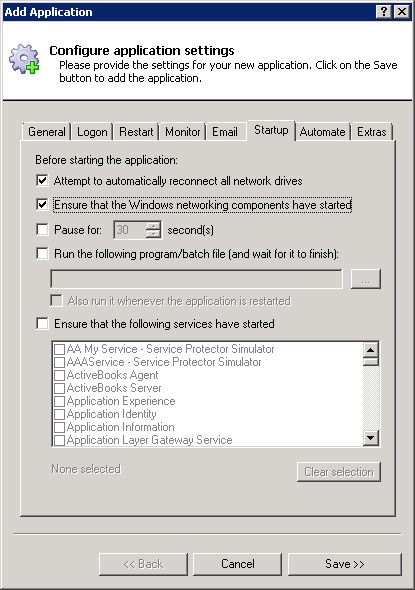
Click over to the Startup tab and check the Ensure that the Windows Networking components have started box.
This informs AlwaysUp that Derby needs the network to do its work.
-
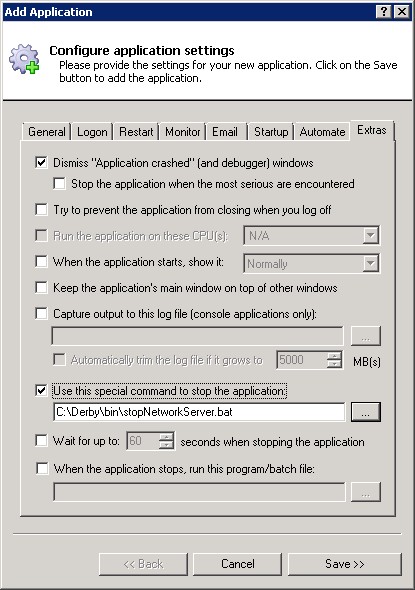
It is best to use stop Derby by running the stopNetworkServer.bat script. To set that up, move to the Extras tab, check the
Use this special command to stop the application box and fill in the path to the batch file in Derby's bin folder.
-
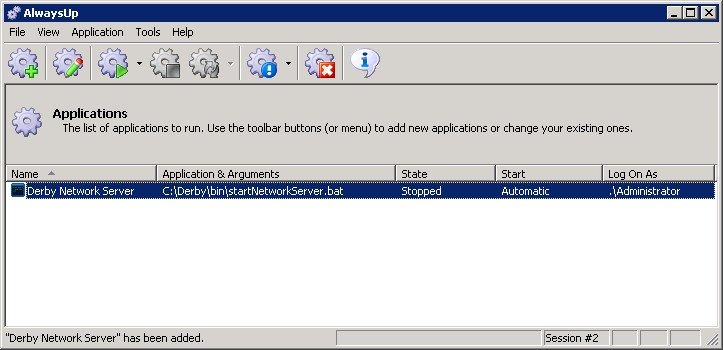
Click the Save >> button. In a couple of seconds, an application called Derby Network Server will show up in the AlwaysUp window.
It is not yet running though.
-
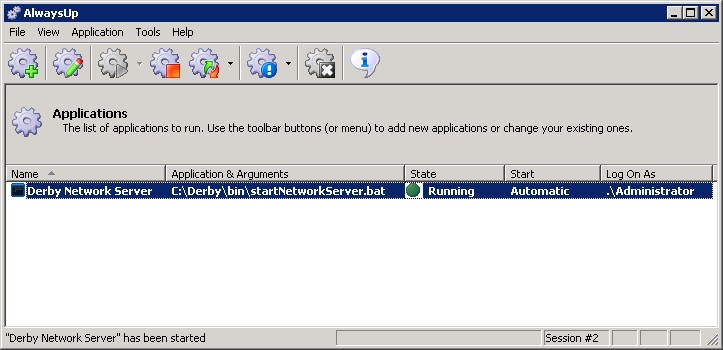
To start Derby from AlwaysUp, choose Application > Start "Derby Network Server".
Note: Derby will be running in Session 0.
You won't see its console window on your desktop.
-
That's it! Next time your computer boots, Apache Derby Network Server will start up immediately, without anyone needing to log on.
Please restart your PC now and test that Derby works as expected after Windows comes back to life.
And please feel free to edit Derby in AlwaysUp to check out the many other settings that may be appropriate for your environment.
For example, send email alerts if it stops, hide the console, boost Derby's priority, etc.
Derby not working properly as a Windows Service?
Consult the AlwaysUp Troubleshooter — our online tool that can help you resolve the most common problems encountered when running an application as a Windows Service.
From AlwaysUp, select Application > Report Activity > Today to bring up an HTML report detailing the interaction between AlwaysUp and Derby. The AlwaysUp Event Log Messages page explains what each message means.
Browse the AlwaysUp FAQ for answers to commonly asked questions and troubleshooting tips. Contact us and we will be happy to help!
|
Over 97,000 installations, and counting!
|
 |

|
Rock-solid for the past 20+ years!
|
Fully Compatible with 160+ Applications...
|