|
How to Run Seafile Daemon as a Windows Service with AlwaysUp |
Start Seafile daemon automatically when your server boots — before anyone logs on. Ensure that your important files are synchronized 24x7x365
Seafile is an open-source file hosting & synchronization system. Its daemon component runs headless, working in the background to keep files up to date.
To install Seafile daemon as a Windows Service with AlwaysUp:
-
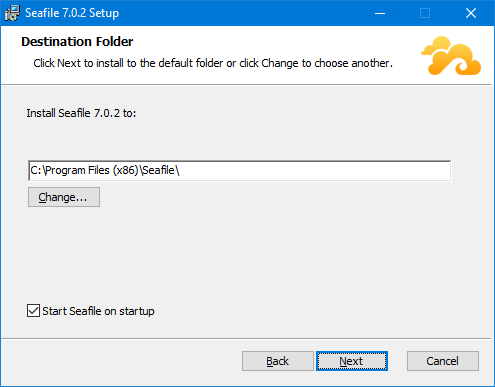
If you have not already done so, download, install and configure Seafile.
We will work with Seafile version 7.0.2 on a Windows Server 2019 machine in this tutorial:
-
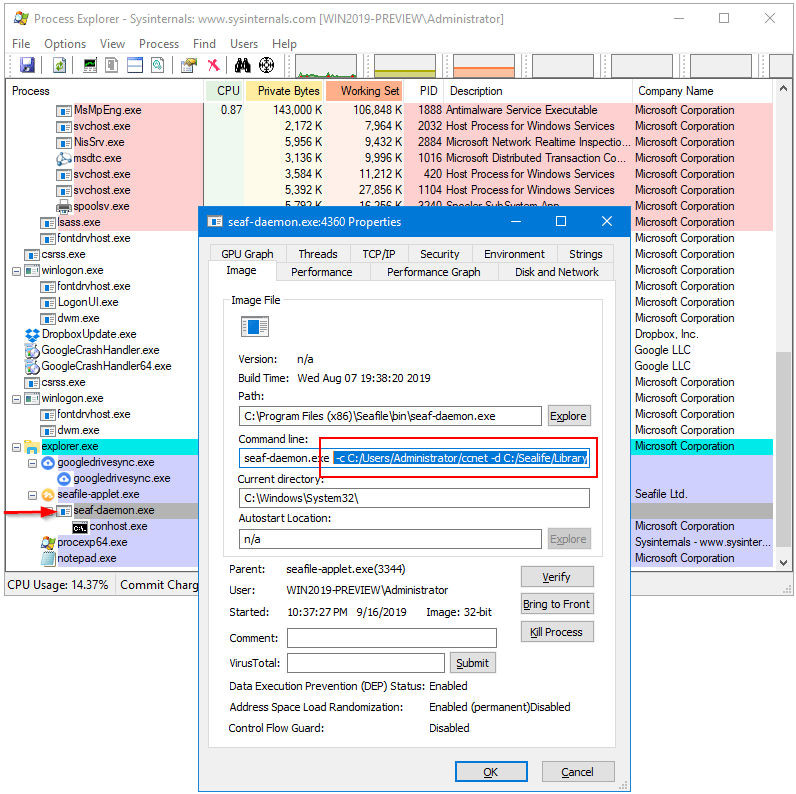
Once you have Seafile working as you would like, let's find out how the Seafile daemon (seaf-daemon.exe) is being started. To do so:
Download and extract Microsoft's excellent Process Explorer.
This free tool will show you everything running on your PC — like Task Manager, but on steroids. You will thank us later  Start Process Explorer as an administrator In the tree of processes on the left, find seaf-daemon.exe. Double-click the line to open the process's properties window. In the Command line field, copy everything after "seaf-daemon.exe". Those are the command line parameters being passed to the Seafile daemon.
For reference, our command line parameters are:
-c C:/Users/Administrator/ccnet -d C:/Seafile/Library/Seafile/seafile-data -w C:/Seafile/Library/Seafile
No doubt your parameters will be different, because your library folder will live somewhere else.
Save your command line parameters to a text file. We'll need them in a later step.
-
Download and install AlwaysUp, if necessary.
-
Start AlwaysUp.
-
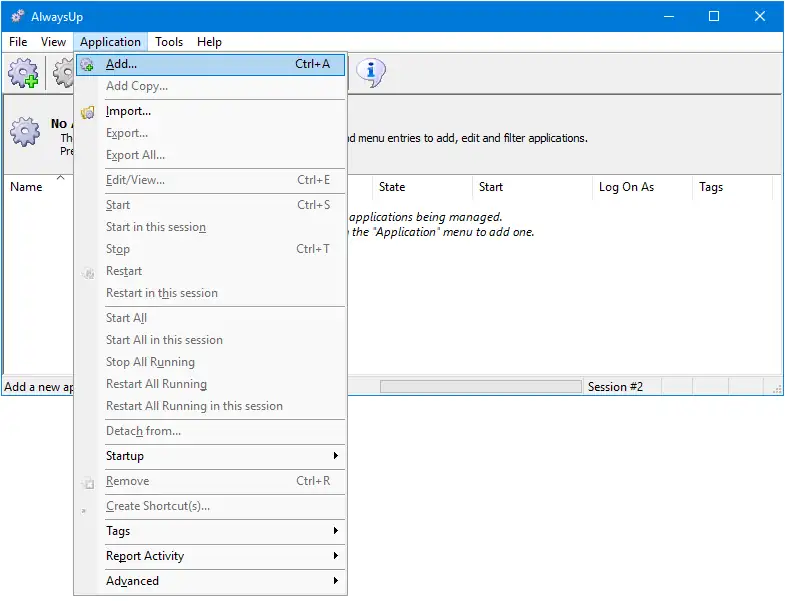
From AlwaysUp, select Application > Add to open the Add Application window:
-
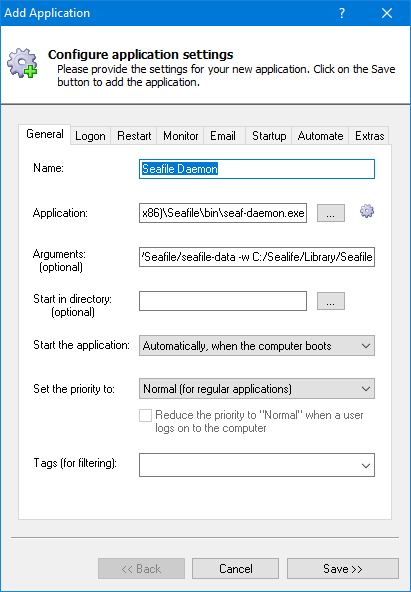
On the General tab:
-
In the Application field, enter the full path to the Seafile daemon executable, seaf-daemon.exe.
If you installed Seafile in the default location, this will be:
C:\Program Files (x86)\Seafile\bin\seaf-daemon.exe
-
In the Arguments field, paste in the parameters you collected in step 2.
-
And in the Name field, enter the name that you will call the application in AlwaysUp.
We have used Seafile Daemon but you can specify another name you like.
-
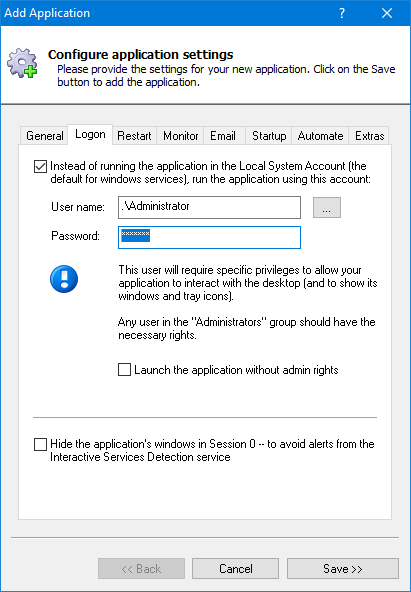
Click over to the Logon tab and enter the username and password of the Windows account in which you installed and use Seafile.
Seafile must run in this account so that it can find its settings:
-
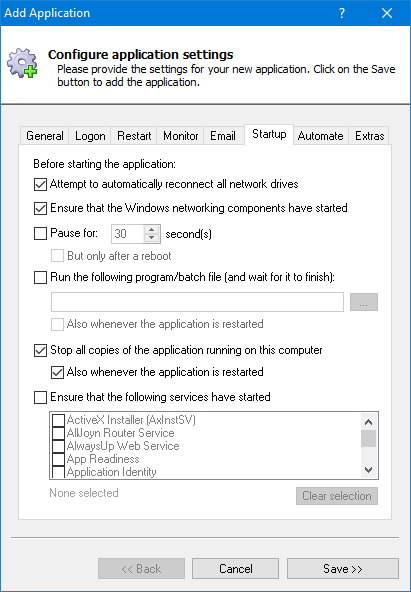
Switch to the Startup tab and:
Check the Ensure that the Windows Networking components have started box.
This informs AlwaysUp that Seafile needs the TCP/IP networking stack to operate.
Check both the Stop all copies of the application running on this computer and Also whenever the application is restarted boxes.
This will help to ensure that only a single copy of the Seafile daemon is active at any time.
-
We're now done configuring the Seafile server in AlwaysUp so click the Save button to record your settings.
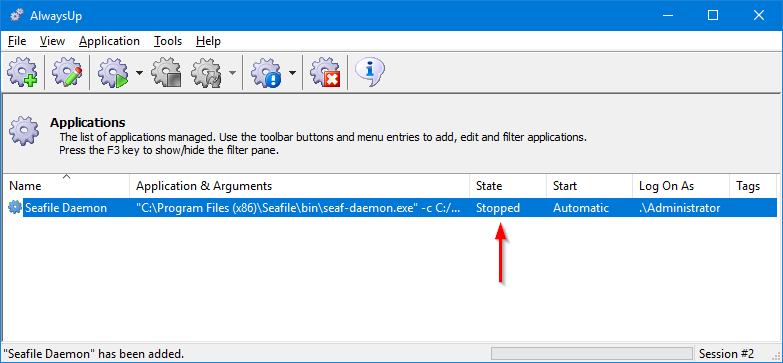
In a couple of seconds, an application called Seafile Daemon will appear in the AlwaysUp window. It is not yet running though and the state will be "Stopped":
-
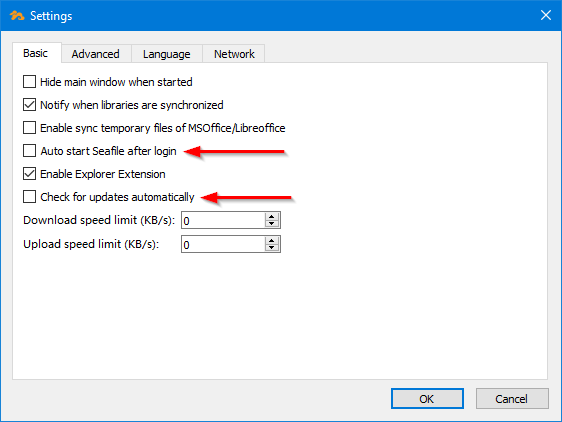
Now that Seafile daemon will start automatically when your computer boots, you no longer need it to start when you log on. To deactivate that option:
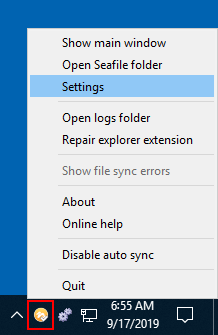
Start Seafile from the desktop icon. Give it a few seconds to start. Right-click on the Seafile tray icon and select Settings to open the Settings window:
In the Settings window, un-check the Auto start Seafile after login option
And while we're here, you might as well automatic updates. The last thing you want is for the daemon to be hung waiting for you to confirm an update when you're not even logged on!
Finally, close Seafile by right-clicking on the tray icon and selecting Quit.
-
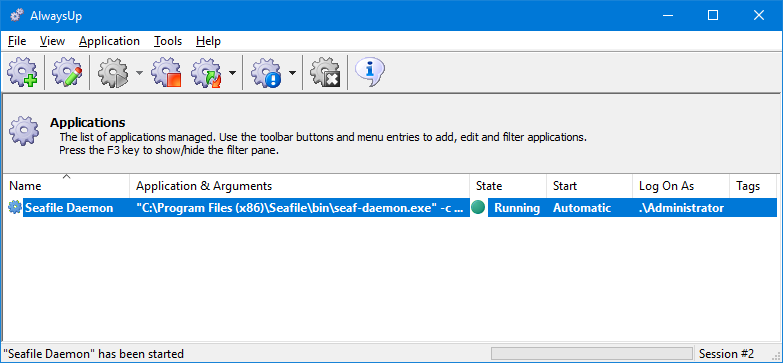
Now switch back to AlwaysUp. To start Seafile daemon, choose Application > Start "Seafile Daemon". The state will transition to "Running" and the usual file synchronization will start in the background:
-
That's it! Next time your computer boots, Seafile daemon will start up immediately, before anyone logs on.
Note: If you want to make changes to Seafile's libraries or configuration, you should:
Stop the daemon/service in AlwaysUp Start the Seafile client (from the desktop icon) Make your changes to Seafile libraries, etc. Quit Seafile (from the tray icon) Restart the daemon/service in AlwaysUp
Seafile daemon not working properly as a Windows Service?
Can you see the Seafile tray icon on your desktop? The Seafile desktop application (which manages the tray icon) will always try to run its own copy of seaf-daemon.exe, and that may cause confusion.
Make sure to quit Seafile from the tray icon, restart the service in AlwaysUp and check file synchronization again.
Consult the AlwaysUp Troubleshooter — our online tool that can help you resolve the most common problems encountered when
running an application as a windows service.
From AlwaysUp, select Application > Report Activity > Today to bring up an HTML report detailing the interaction between AlwaysUp and Seafile.
The AlwaysUp Event Log Messages page explains the messages that may appear.
Browse the AlwaysUp FAQ for answers to commonly asked questions and troubleshooting tips.
Contact us and we will be happy to help!
|
Over 97,000 installations, and counting!
|
 |

|
Rock-solid for the past 20+ years!
|
Fully Compatible with 160+ Applications...
|

