-
Download and install FreeFileSync, if necessary. This will also install RealtimeSync.
-
If necessary, setup a RealtimeSync configuration file that monitors your folders and performs the desired synchronization.
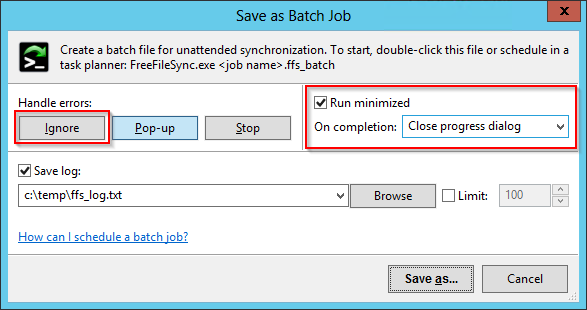
To ensure smooth operation in the background, be sure to check the Run minimized box and select the Close progress dialog option when creating the FreeFileSync batch file
that RealtimeSync will run. We also recommend selecting to Ignore errors and entering the full path to a log file that you will check regularly for errors and warnings. All these settings are
documented in the FreeFileSync help file.
-
Download and install AlwaysUp, if necessary.
-
Start AlwaysUp.
-
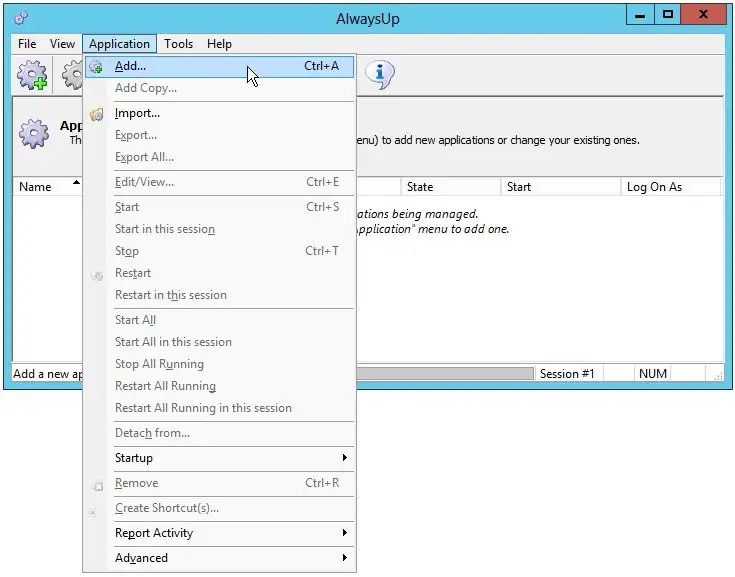
Select Application > Add to open the Add Application window:
-
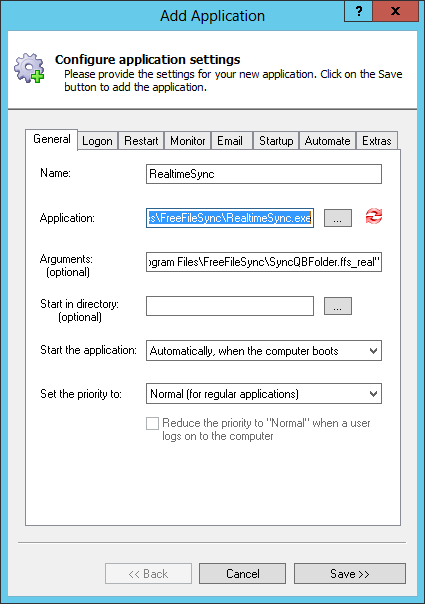
On the General tab:
-
In the Application field, enter the full path to the RealtimeSync executable, RealtimeSync.exe.
If you have installed FreeFileSync in the default location, this will be:
C:\Program Files\FreeFileSync\RealtimeSync.exe
-
In the Arguments field, enter the full path to your RealtimeSync configuration file (*.ffs_real).
Our file is called SyncQBFolder.ffs_real and it lives in the FreeFileSync folder, so we'll specify that full path in this tutorial.
Be sure to place your entire path in quotes if it contains a space!
-
In the Name field, enter the name that you will call the application in AlwaysUp.
We have stuck with the default (RealtimeSync) but you can enter another name if you prefer.
-
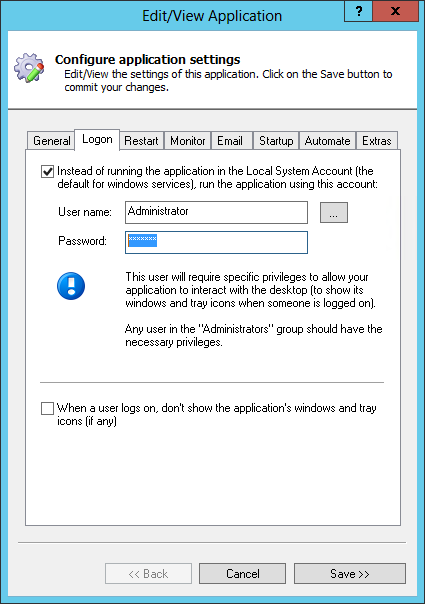
Switch to the Logon tab and enter the username and password of the account in which you installed and configured FreeFileSync - probably the account you are logged in to right now.
It is very important that RealtimeSync runs in this account to find its settings!
-
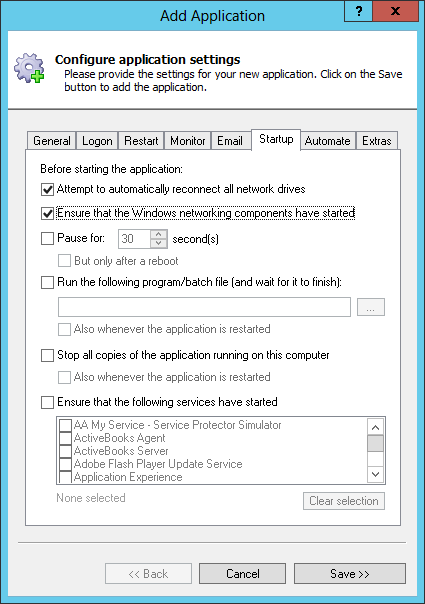
Click over to the Startup tab and check the Ensure that the Windows Networking components have started box.
This informs AlwaysUp that RealtimeSync needs networking support to do its work.
-
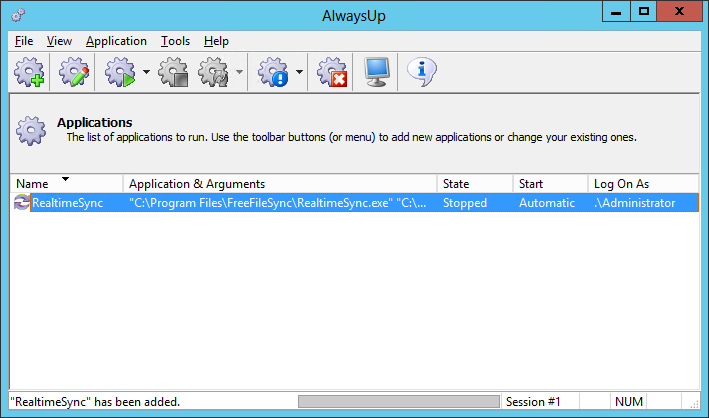
We are now done setting up RealtimeSync to run as a windows service so click the Save button to record your settings.
In a few seconds, an entry for called RealtimeSync (or whatever you called it) will show up in the AlwaysUp window.
It is not yet running though, and the state will be Stopped:
-
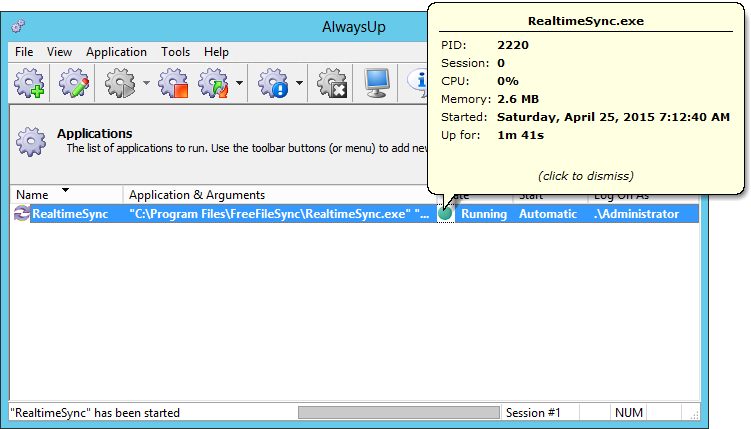
To start RealtimeSync from AlwaysUp, choose Application > Start "RealtimeSync". The application will start in the background, on the
isolated Session 0, and you won't see the usual tray icon on your desktop.
Click the green circle to open a tooltip with details of the running process:
-
That's it! Next time your computer boots, RealtimeSync will start monitoring and synchronizing your folder immediately, before anyone logs on.
We encourage you to edit RealtimeSync in AlwaysUp and check out the many other settings that may be appropriate for your environment.
For example, boost RealtimeSync's priority (if it has a lot of copying to do), send an email if RealtimeSync crashes,
prevent the computer from automatically going to sleep, and much more.

