-
Download and install AlwaysUp, if necessary.
-
If you don't have Syncthing installed, download the latest zip file from GitHub
and expand it to a new folder on your hard drive. We have installed version 0.10.11 in C:\Syncthing for this tutorial and that folder will show up throughout this tutorial.
-
Next, start AlwaysUp.
-
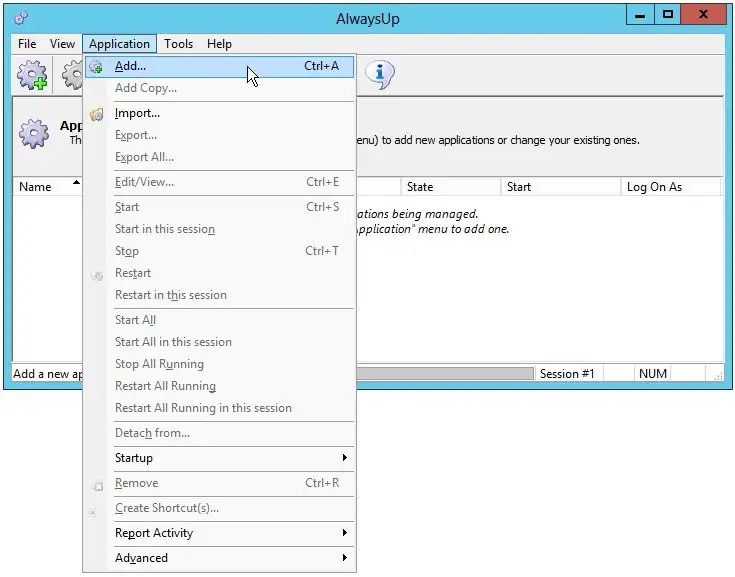
Select Application > Add to open the Add Application window:
-
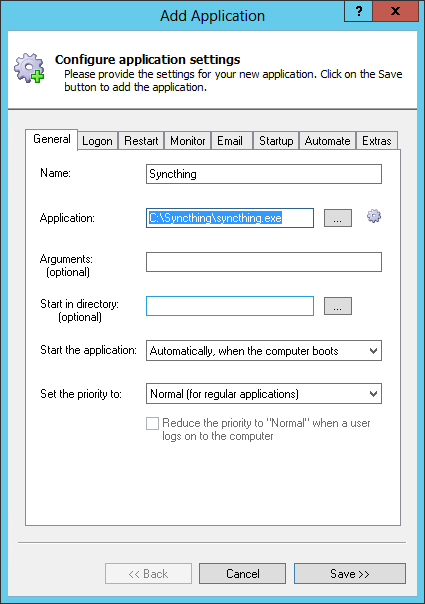
On the General tab:
-
In the Application field, enter the full path to the Syncthing executable, syncthing.exe.
Since we placed Syncthing in C:\Syncthing, this is C:\Syncthing\syncthing.exe. Your path may be different.
-
In the Name field, enter the name that you will call the application in AlwaysUp.
We have used Syncthing (the default) but you can specify another name you like.
-
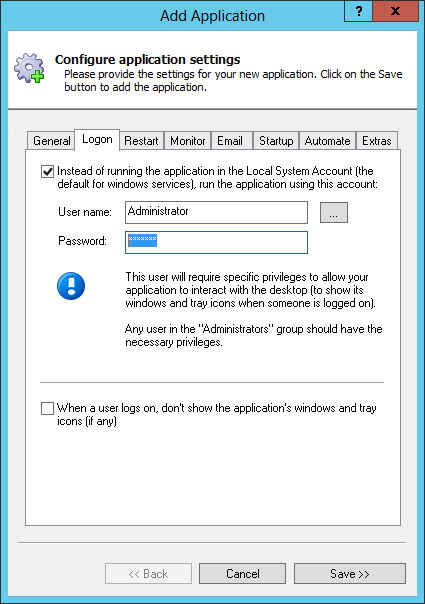
Click over to the Logon tab and enter the user name and password of the account in which you have configured and run Syncthing.
By default, Syncthing stores its settings in the user-specific %AppData% folder and running it in the same account will ensure that Syncthing will find its configuration.
-
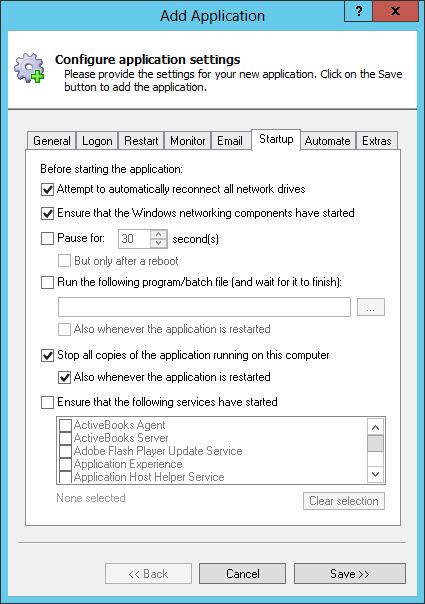
Click over to the Startup tab:
-
Check the Ensure that the Windows Networking components have started box.
This tells AlwaysUp that Syncthing needs the TCP/IP networking stack to do its work.
-
Because only a single copy of Syncthing can run at any time (due to the use of a single network port),
check the Stop all copies of the application running on this computer box, and the Also whenever the application is restarted setting below. This will ensure
that other instances of Syncthing don't prevent the copy launched by AlwaysUp (as a windows service) from starting properly.
-
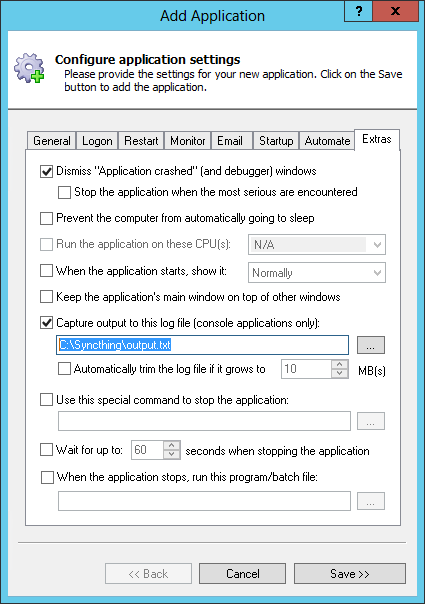
Since Syncthing will no longer be visible on your desktop, you may want to capture the messages from the console to a file.
To do so, switch to the Extras tab, check the Capture output to this log file box and enter the full path to a text file.
-
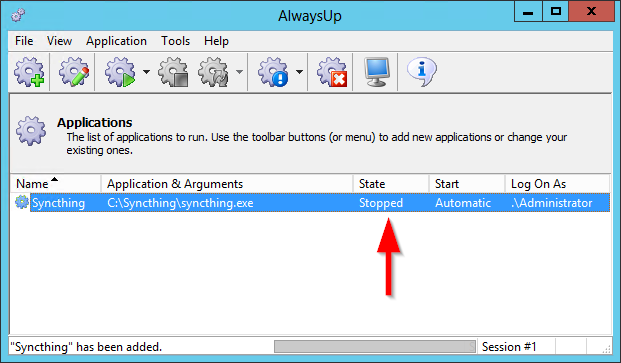
Click the Save button. In a couple of seconds, an entry called Syncthing will show up in the AlwaysUp window.
It is not yet running though.
-
And now that we are ready to start Syncthing as a windows service, let's configure the software to avoid launching the browser when it starts (since you won't be able to see it any more). To do so:
Start Syncthing
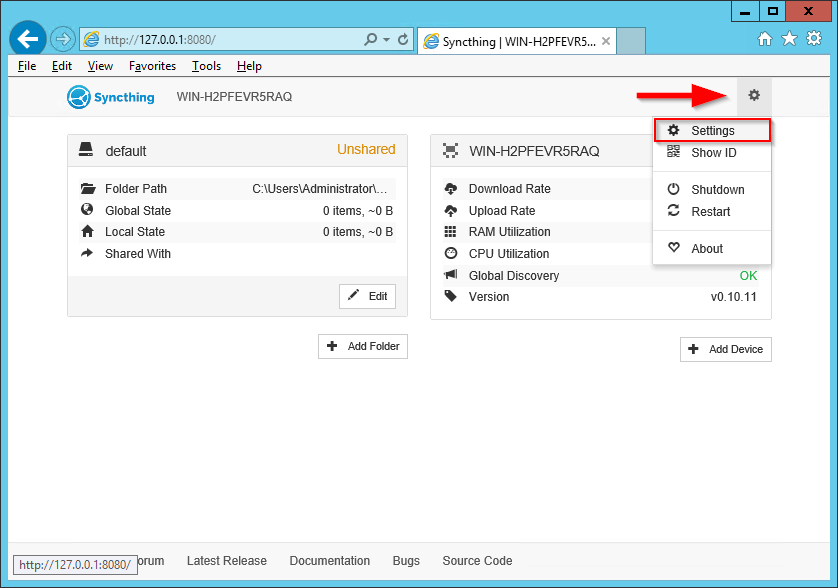
Open the web GUI in your browser (probably at http://127.0.0.1:8080/)
-
Click the gear at the top right and select Settings from the menu that appears:
-
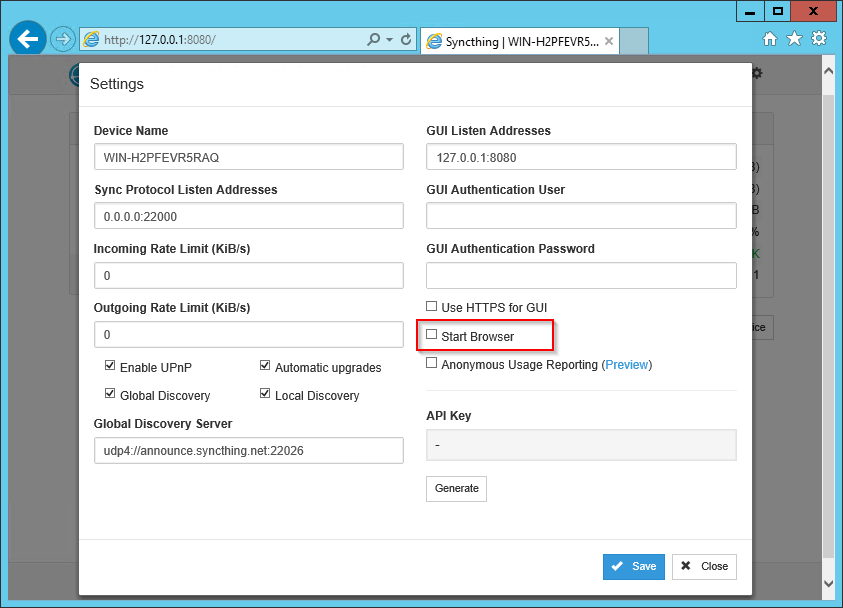
Uncheck the Start Browser box:
Save your settings
-
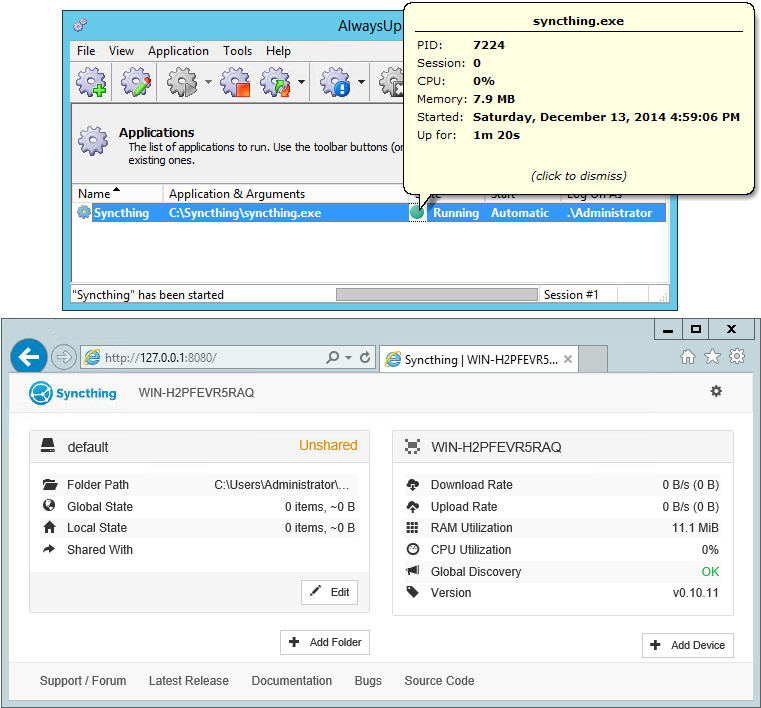
To start Syncthing from AlwaysUp, choose Application > Start "Syncthing". After a few seconds, the state should transition to Running and Syncthing will be working in the background.
Open your browser and confirm that things work as expected:
-
That's it! Next time your computer boots, Syncthing will start up immediately, before anyone logs on.
We encourage you to edit Syncthing in AlwaysUp and check out the many other settings that may be appropriate for your environment.
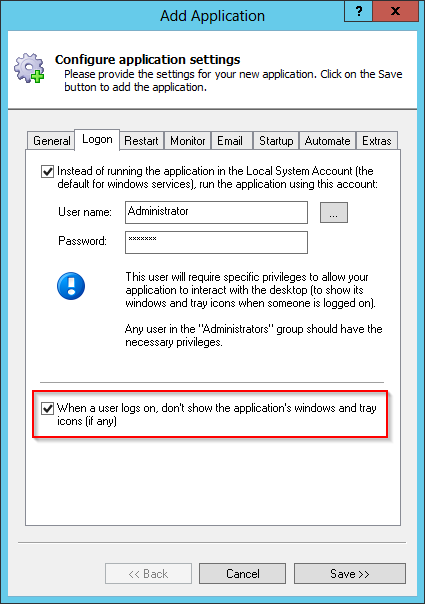
For example, to completely hide Syncthing's console (and prevent the annoying
Interactive Services Detection window from winking at you constantly),
return to the Logon tab and check the
When the user logs on, don't show the application's windows and tray icons box at the bottom.

