-
If you don't already have TwoToneDetect installed, install it now.
Download the zip file
and extract its contents to a new folder. We placed TwoToneDetect in C:\TwoToneDetect on our machine and that path will show up throughput this tutorial.
-
Download and install AlwaysUp, if necessary.
-
Start AlwaysUp.
-
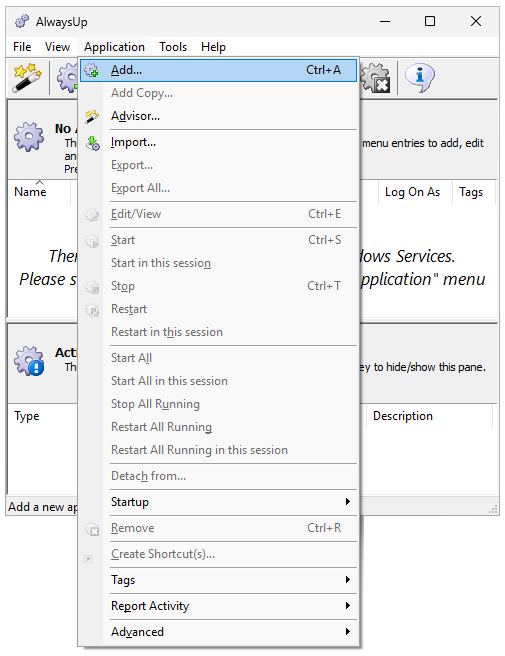
Select Application > Add to open the Add Application window:
-
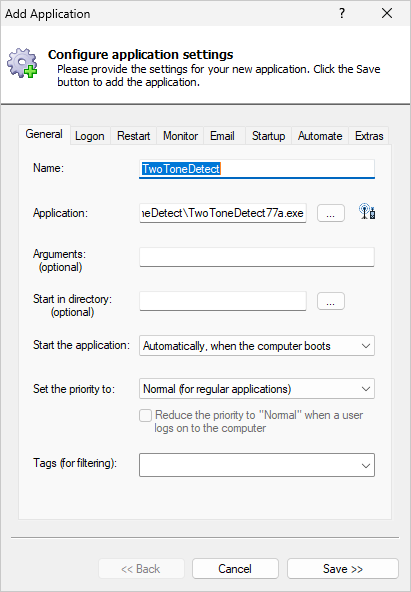
On the General tab:
-
In the Application field, enter the full path to TwoToneDetect executable. Since we installed version 77, this is TwoToneDetect77a.exe for us.
The name on your system may vary slightly.
-
In the Name field, enter the name that you will call the application in AlwaysUp.
We went with TwoToneDetect but you can specify another value if you like.
-
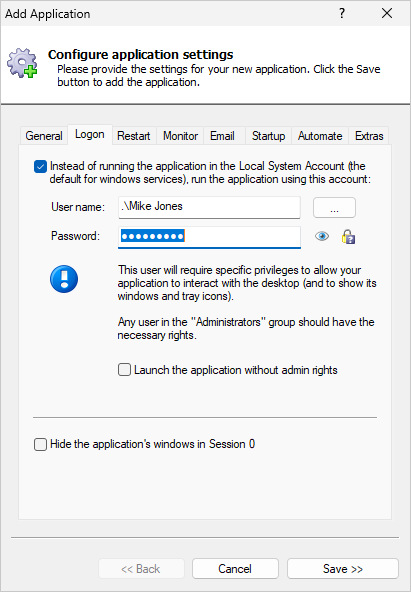
Switch to the Logon tab and enter the username and password of the account where you can run TwoToneDetect normally - probably the account you are logged in to right now.
While not necessarily required, we recommend running in a user account to avoid running into any security issues...
-
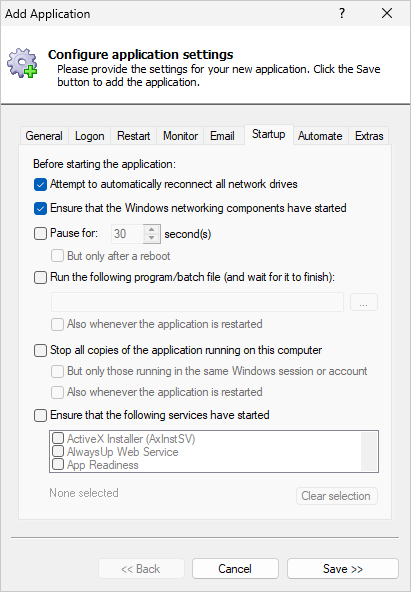
Click over to the Startup tab and check the Ensure that the Windows Networking components have started box.
This informs AlwaysUp that TwoToneDetect needs TCP/IP networking support to do its work.
-
We're done configuring TwoToneDetect to run as a service so click the Save button to record your settings.
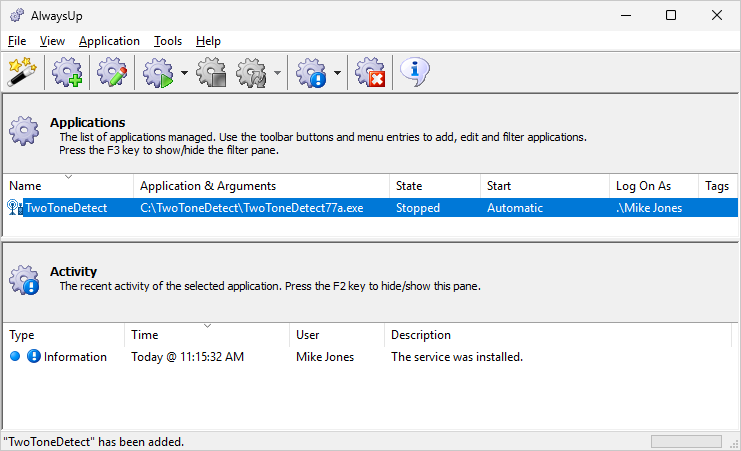
In a few seconds, an entry for TwoToneDetect (or whatever you called it) will show up in the AlwaysUp window.
It is not yet running though, and the state will be "Stopped":
-
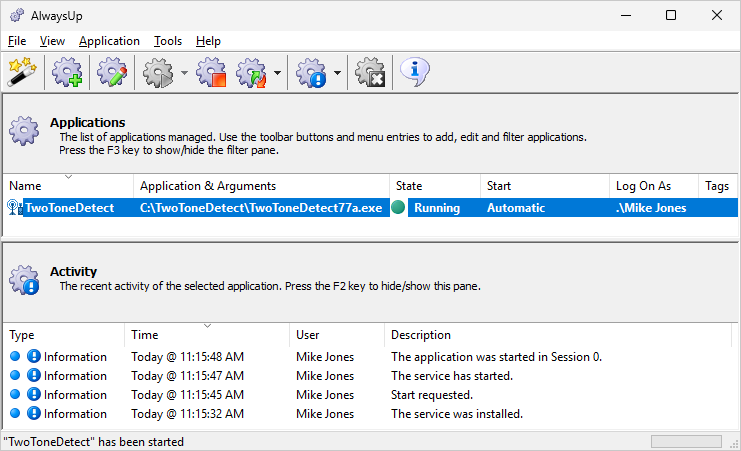
To start TwoToneDetect from AlwaysUp, choose Application > Start "TwoToneDetect". The server will start "invisible", in the background, on the
isolated Session 0.
You won't see it on your desktop:
If you wish to see TwoToneDetect window, select
Application > Start "TwoToneDetect" in this session to run it visibly on your desktop.
-
That's it! Next time your computer boots, TwoToneDetect will start up immediately, before anyone logs on.
We encourage you to edit TwoToneDetect in AlwaysUp and check out the many other settings that may be appropriate for your environment.
For example, send an email when TwoToneDetect crashes,
restart the program nightly to cure memory leaks, and much more.