To launch your AlwaysUp application whenever you sign in to your Windows account:
Step 1: Compose the command to start your application in the interactive session
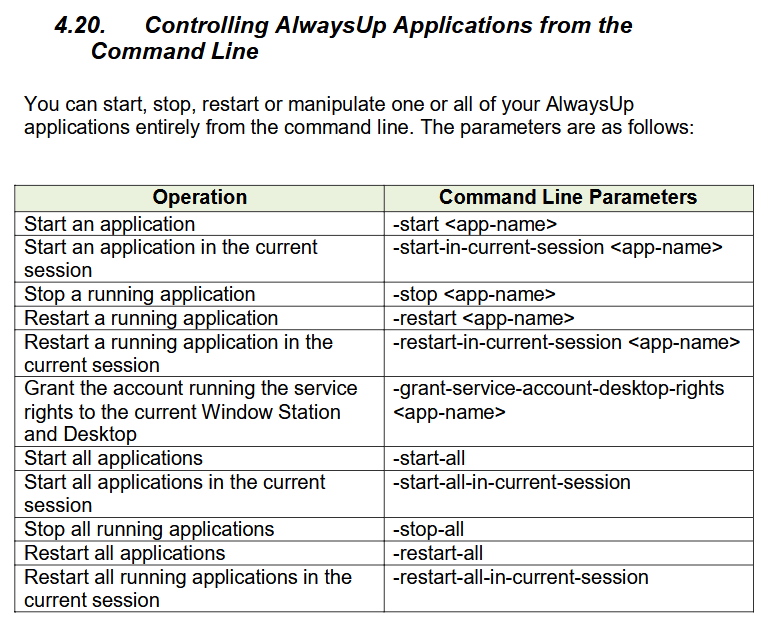
AlwaysUp gives you the flexibility to control your applications from the command line.
The
User Manual
outlines the various capabilities:
So this command will restart your application in the current, interactive session:
"C:\Program Files (x86)\AlwaysUp\AlwaysUp.exe" -restart-in-current-session "MyAppName"
where MyAppName is the name of your application in AlwaysUp.
Step 2: Run your command whenever you log in
The easiest option would be to stick your command in the Startup Folder, but that doesn't work.
The problem is that AlwaysUp.exe runs with elevated rights and Windows
blocks programs from auto-launching with elevated rights
from the Startup Folder.
As a result, we must resort to the
Windows Task Scheduler
instead. Here's how to set that up:
-
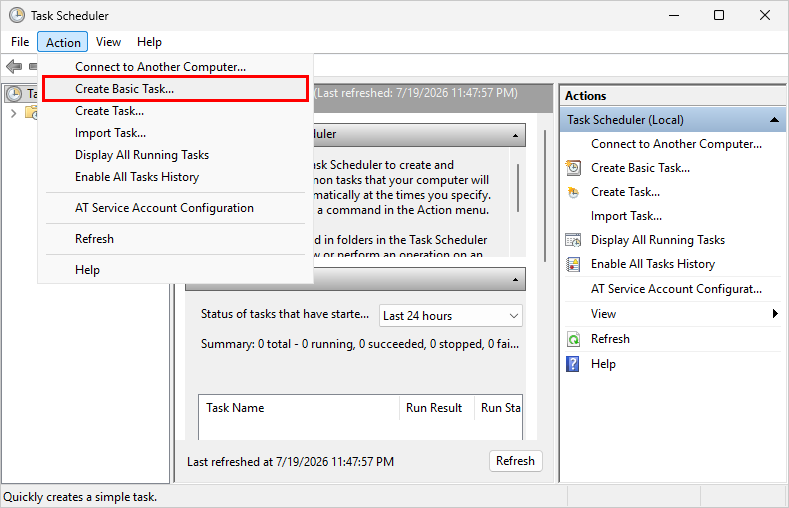
Start the Task Scheduler. Press the Windows Key, type Task Scheduler, and press Enter.
-
Select Action > Create Basic Task to open the Create Basic Task Wizard window:
-
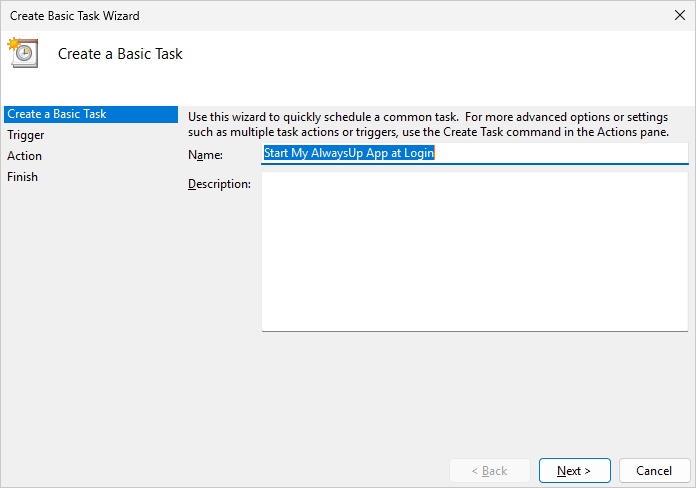
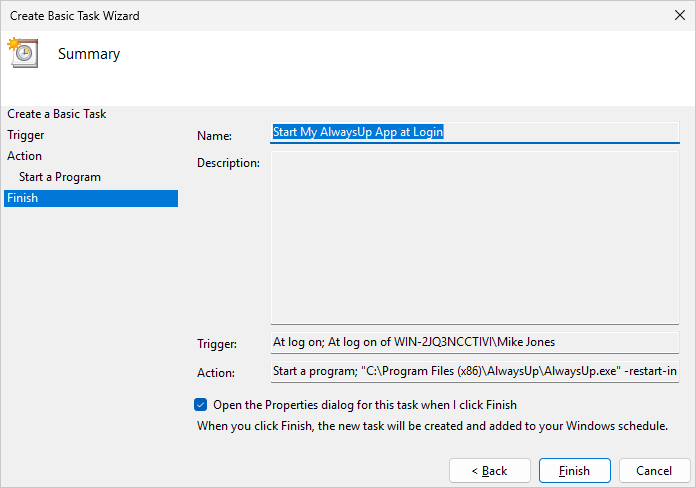
In the Name field, enter a name for the new task.
We specified Start My AlwaysUp App at Login but you can specify anything you like:
Click Next to proceed.
-
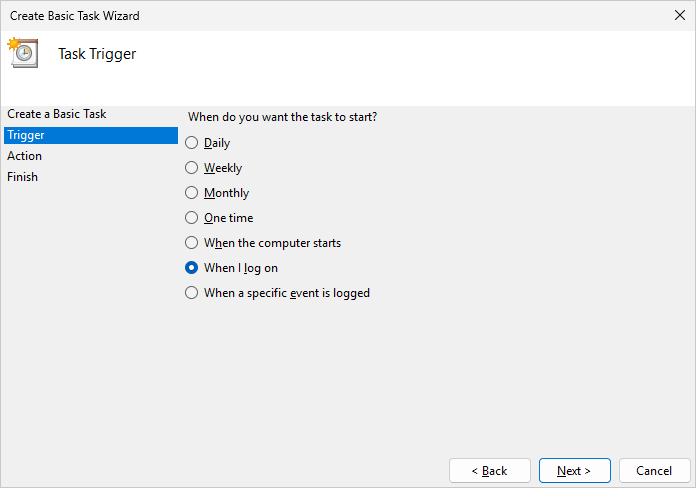
Specify when the task should be started. Select When I log on.
Click Next.
-
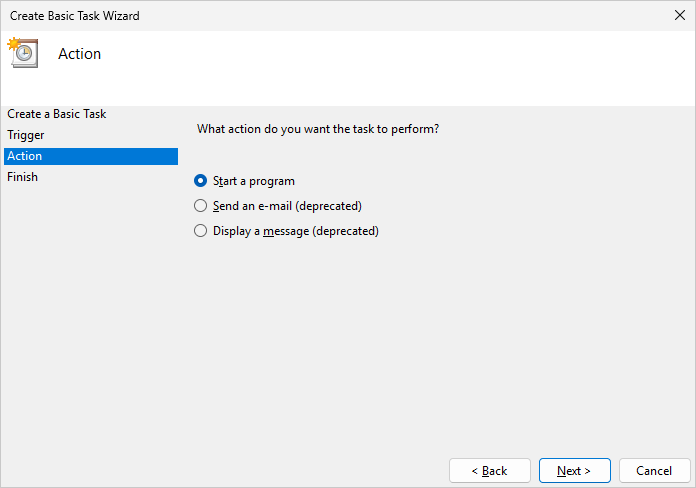
Specify what the task should do. Leave the selection at the default, Start a program, and click Next to proceed:
-
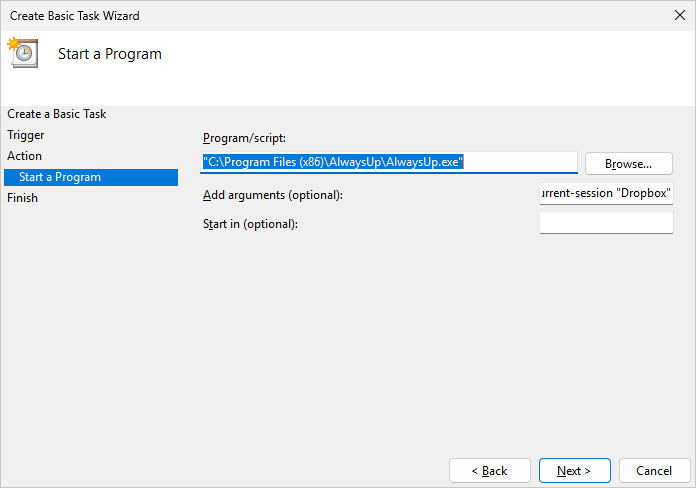
At this point, enter the AlwaysUp command you composed in Step #1.
-
In the Program/script field, enter the full path to the AlwaysUp executable. By default, this is:
"C:\Program Files (x86)\AlwaysUp\AlwaysUp.exe"
The quotes are required because of the space in the path.
-
In the Add arguments (optional) field, enter:
-restart-in-current-session "MyAppName"
where MyAppName is the name of your application in AlwaysUp.
For example, we you have an application called "Dropbox" in AlwaysUp so these arguments work for us:
-restart-in-current-session "Dropbox"
Click Next to move on.
-
Almost done! Check the Open the properties dialog for this task when I click Finish near the bottom and click the Finish button.
-
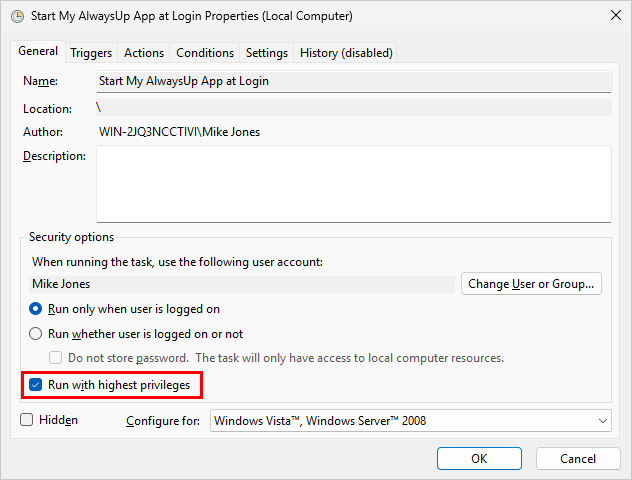
On the properties window that comes up, check the Run with highest privileges box.
This magic is necessary to avoid an annoying UAC Prompt when you log in.
Click OK to save the new scheduled task.
-
That's it. Next time you log on you should see your AlwaysUp application running on your desktop.
Application not working properly as a Windows Service?
Consult the AlwaysUp Troubleshooter — our online tool that can help you resolve the most common problems encountered when running an application as a Windows Service.
From AlwaysUp, select Application > Report Activity > Today to bring up an HTML report detailing the interaction between AlwaysUp and your application. The AlwaysUp Event Log Messages page explains what each message means.
Browse the AlwaysUp FAQ for answers to commonly asked questions and troubleshooting tips.
Contact us and we will be happy to help!